
Track lighting comes instructions from the manufacturer which helps you effectively on how to replace track lighting head and how to change track lighting bulbs. Sometimes this instruction seems vogue for few customers, and they feel better to search on the internet. And we are prepared our todays writing with both of these query. It are the manual work for doing this you cold not call the expert, at the same to complete this task successfully provide bright illumination on by following the reliable guideline.
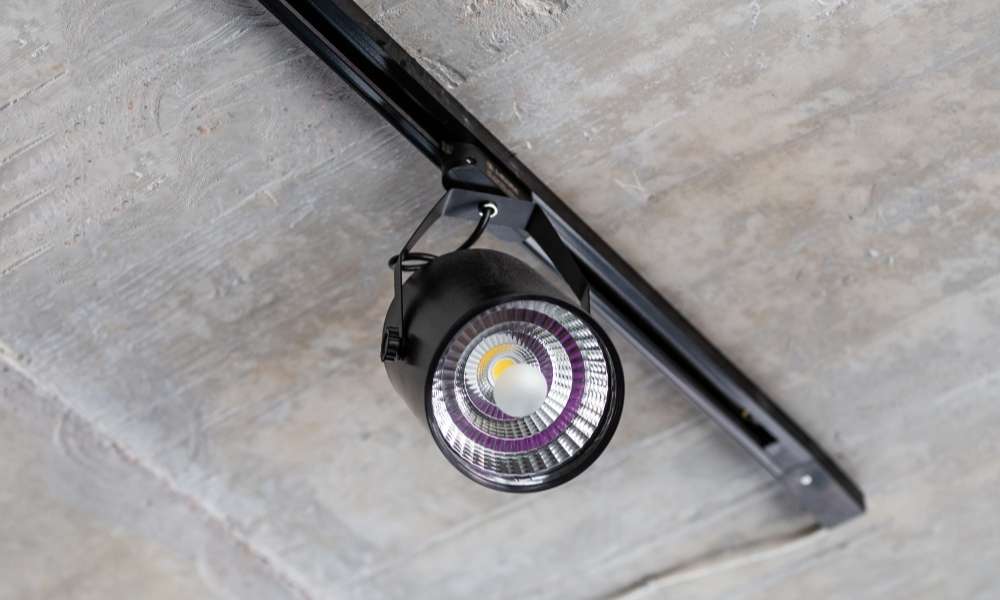
Through track light you can highlight any space of your home or commercial areas such as studio, art room, shelves which is full of collectible thing even kitchen or garage where you need a good amount of lighting. This lighting basically works accompanying with an electrified tract which is mounts on the ceiling or wall.You can attach track heads amount per your need and demand any position of that rail.
Best Track Lighting (Ultimate Reviews and Buying Guide)
Replacing the track lighting heads and changing the bulbs are very easy for anyone. With the right fixture which comes from the same manufacturers highly recommended for this purpose. In this way you don’t need to worry about their compatibility and perfectly matching replacement fixtures set.
Safety precautions

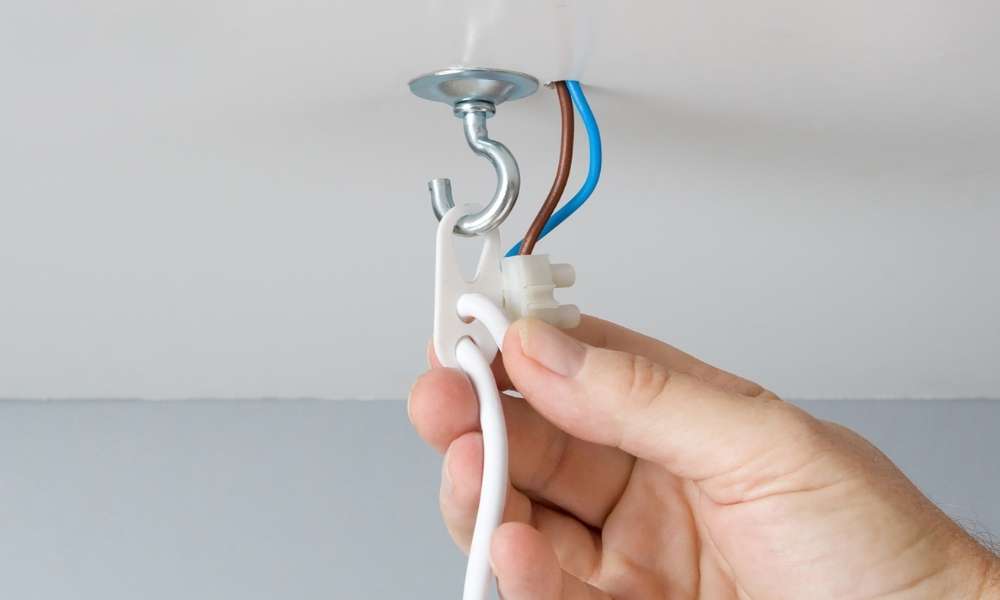
While you are going to work with electrical fixture like track illumination fixtures or other, you or another family member can easily face unwanted accidents like electrical shocked. So should be careful about this. Firstly turn of the power. It would be more dependable if you can power off from circuit breaker for your home. Don’t stop with it use a noncontact voltage tester to test the voltage at the track to being sure the location is safe for working time. Put on protection gloves as in some cases bulb will be sensitive, hot or break down accidentally.
Choose the right replacement
Though track illumination has its own fixturing whole set for their own manufacturer. As in most of the cases bulb or other content do not permit other companies things. While some of the connectors can be interchangeable but con all the contents. If you getting confused to find the right fixture talk to the specializes which is correct matching with the mounting system as bit difference can occurs big damage for their functionality.
See more: night stand decor ideas
How to Replace Track Lighting Heads
In general tracking light fitting and other fixtures, and components arrive in the market set together from the same individual manufacturers so you will get differences in their appearance and features but mounting methods are quite similar. In the rest of we will learn you how to replace track illumination heady with the following simple steps. These have e look:
Step-1: Find the lock switch
When you are pretty sure that there is no electrical running, then start to move your next to look for a lock and unlock switch which must be situated near the top of the fixture. If you find it then unlock it. One more thing if your ceiling is so high careful about your ladder placement, don’t stand it straight or have endways that make a blunder when you have climbed and struggled with it.
Step-2: Loosen the fixture
Keep twisting the fixture clockwise for approximately a quarter. As a result, the head will be loosen , then pull down smoothly for removing it.
Step-3: Remove the old fixture
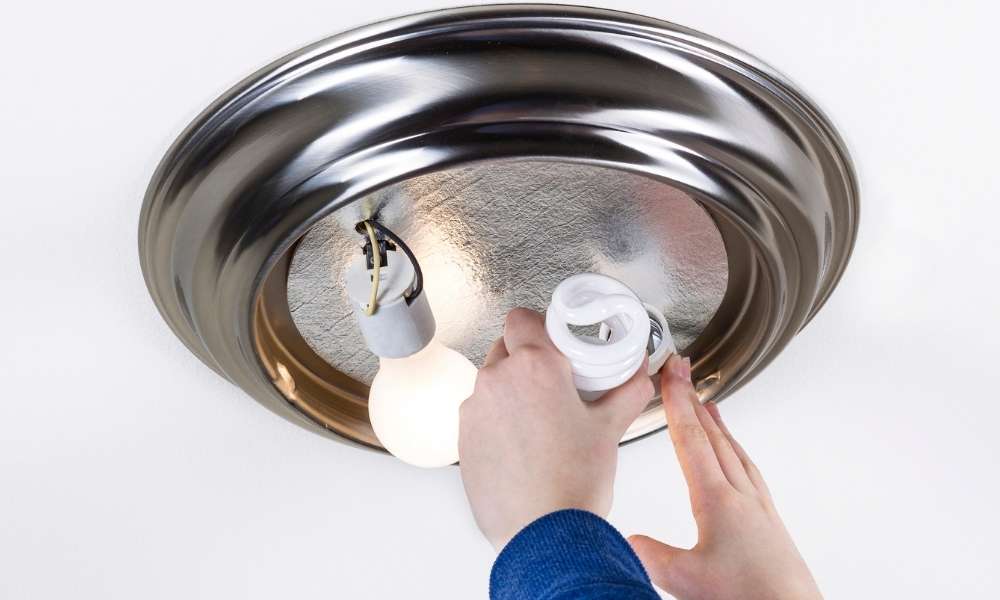
Track lighting has a wide range of track heads option you can easily grab one of them when you think this one is not being charming or stopped working. If you find any plastic ring around the bulb remove this accurately for making the rest of the work easily then press the front part of the bulb and twits it slowly counterclockwise.
Step- 4: Use a double plastic bag
When you successfully remove the bulb from the saucet use a double plastic bag to hold this which is safe if bulbs break apart and pour chemicals which are harmful.
Step-5: Replace the bulb
Now, place the bulb and secure it screwed clockwise until it looks perfectly seated on it.
Step-6: Hooked the new track head
Don’t be stop to turn the new track head clockwise whether it feels comfortable
Step-7: Press the lock button
If you really don’t want to climb the ladder again don’t forget to press the lock switch. And recheck all the frames.
Step-8: Testing the replacement

Turn on the power to the circuit and breaker the entire home service panel ( if you turned it on when you started working ). If the system works perfectly you did it. on the other hand, it won’t illuminate don’t do directly this system firstly check the bulb placement.
Dispensing the types of tracking lights rail and their heads this method can be little different so be sure about then the manufacturer’s guideline. While it is the most common but misleading fixture so don’t be aggressive to do all these steps.
Conclusion
Particularly replacement of the track head offers the entire change their look. And we tried to make the whole method of how to replace the track lighting heads easy by a few steps which are based on your safety issue while your are going to replace it. We are sure that this will help you effectively rather the manufacturer’s instruction. As track illumination provides an opportunity to update them the overall appearance with some easy steps and few minutes with only heads changing you should poach this for your next remodeling ideas.