

I still remember the first time I installed recessed lighting in my living room. I wanted a simple, modern look. The process seemed tricky, but it turned out to be much easier than expected. Canless recessed lights were the perfect choice for a clean and sleek design. Wiring canless recessed lighting is a great DIY project. It’s simpler than traditional recessed lighting. You won’t have to deal with bulky housing. Canless lights give your space a modern feel and are easy to install. In this guide, I’ll show you how to wire canless recessed lighting. Whether you choose a halo pot light or a halo ultra-thin downlight, the process is the same. By following the steps, you can install your lights quickly and easily.
What is Canless Recessed Lighting?
It is a modern, sleek option for lighting your home. Unlike traditional recessed lights, it doesn’t require bulky housing. The light fits directly into the ceiling, Giving a clean, Simple look.
These lights are popular in modern homes because they are easy To install. They don’t need large holes or extra space in the ceiling. This makes them great for low ceilings Or minimalist designs.
Many recessed cans Are LED-based, making them energy-efficient. LEDs last longer and use less power. They also provide bright, clear lighting that enhances the room.
01. Turn off the Power (Important for Safety)

Before you start, Safety comes first. Make sure To turn off the power at the circuit breaker. This will prevent any accidents while you work. It’s easy to forget, But taking this step will give you peace Of mind throughout the installation process. For a stylish and efficient option, check out the best recessed lighting for bathroom to elevate your space.
02. Determine the Placement of Your Lights
Now that the power is off, It’s time to plan where your lights will go. Think about the space you’re lighting. Do you want a spotlight effect Or soft ambient lighting? Try to space the lights evenly for A balanced look. I always find it helpful to use a pencil To lightly mark where each light will be placed on the ceiling.
Tips on Spacing and Layout:
A general rule of thumb is to place the lights about 4-6 feet apart for a consistent spread of light. If you’re installing a halo pot, take care to avoid placing them near ceiling fans or vents, as these can cause uneven lighting.
03. Install the Junction Box and Prepare the Wiring
Next, Install the junction box where your wires will connect. If your kit doesn’t come with A junction box, you’ll need to install one. Ensure the box is securely fixed To the ceiling framing. The junction box will be your wiring hub. Then, Prepare the wires for the connection by stripping off the insulation from the ends.
How to Wire the Junction Box Properly:
Make sure you connect the correct wires to the right places. White wires go to the neutral side, And black wires go to the hot side. A mistake here could cause issues, So take it slow and double-check everything.
04. Connect the Wires

Now, it’s time to connect the wires To the canless recessed light. You’ll typically have two wire connectors—one for the hot wire (black) And one for the neutral wire (white). Use wire nuts to twist the wires securely together, Making sure there Are no exposed wires. It’s essential that each connection is tight To avoid electrical problems later on.
Proper Wiring Technique:
To connect, twist the black (hot) wire to the black wire from the light. Do the same for the white (neutral) wire. Always follow the manufacturer’s instructions that come with your canless light. This ensures you don’t make any errors.
05. Secure the Light Into Place
Once the wires are connected, it’s time to install the light. For halo ultra-thin downlight models, You’ll just need to snap the light into place. The light should fit snugly against the ceiling. For extra security, Some models might come with clips or screws to hold the light in position.
Simple Installation Process for a Halo Ultra-Thin Downlight:
The ultra-thin design of the Halo downlight makes it quick and easy to install. After securing the light, make sure it’s centered and sitting flush with the ceiling.
06. Test the Light and Turn on the Power
Once everything is in place, It’s time for the final test. Turn the power back on at the breaker. Flip the light switch And check that your light turns on. If it doesn’t, double-check the wiring connections To make sure everything is secure.
Tips for Perfect Installation

Spacing Tips: How to Create Even Lighting
For even lighting, space your canless recessed lights 4 to 6 feet apart. This helps light up the room without dark spots. In long rooms, place lights along the center to create a uniform glow. For low ceilings, keep the lights closer together to spread the light evenly.
Common Mistakes: Mistakes to Avoid
A common mistake is wiring the lights incorrectly. Be sure to connect black wires to the hot side and white wires to the neutral side. Another mistake is poor spacing. Too few lights can leave areas dim, While too many can cause harsh shadows. Avoid placing lights near ceiling fans Or vents to keep the lighting consistent.
Maintenance Tips: How to Maintain Your Canless Recessed Lights
To keep your lights working well, clean them regularly. Dust can dim the light over time, so wipe them down with a microfiber cloth. Check the wiring and ensure the lights are secure. This helps the lights last longer and keeps them functioning properly.
Personal Experience or Insight: A Tip I Learned from Installing Recessed Lighting
I once spaced my recessed lights too far apart. The room had uneven lighting, and it looked off. After adjusting the spacing, the lighting was much better. Proper planning for light placement makes a big difference in the final result.
When to Use Canless Recessed Lighting vs. Traditional Recessed Lighting
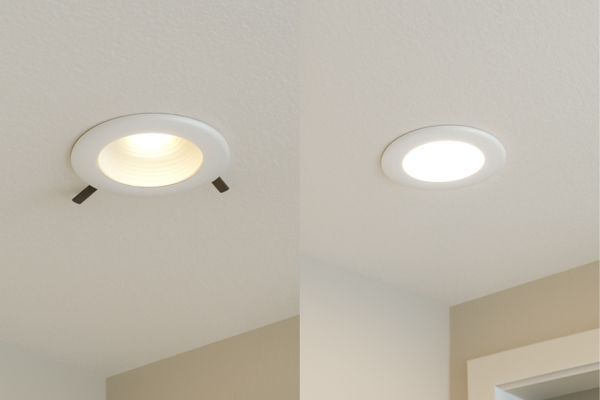
It differs from traditional lighting in design. Traditional lights require large housings inside the ceiling, which takes up space. Canless fit directly into the ceiling, offering a sleek, modern look and are easier to install.
Advantages of Using Canless Recessed Lights in Certain Areas
It works well in kitchens, bathrooms, And hallways. They provide bright, even light and save space. In kitchens, They offer efficient lighting without bulky fixtures. In bathrooms and hallways, They add a stylish touch while being practical.
Conclusion
To recap, Safety is the top priority when installing canless lighting. Always turn off the power at the breaker before starting. Plan your layout carefully, Spacing the lights evenly For the best effect. Follow each step of the installation process, from wiring to securing the light, To ensure everything is set up correctly.
Don’t be afraid to give it a try! Installing recessed lighting is a rewarding DIY project. With a little preparation and patience, you can easily transform your space.