

Replacing a canless recessed light might sound tricky. I once thought it would be a huge job. But after doing it myself, I realised it’s pretty simple. It’s a task anyone can handle with just a few tools. This lights are great. They save space, look modern, and use less energy. These lights have become a popular choice for many homes. Their sleek design fits into any room, and they help lower energy bills. You don’t need to be a pro to replace canless recessed lighting. It’s a beginner-friendly DIY task. With some basic tools and a little time, you can do it yourself. Let’s get started and I’ll walk you through it.
Understanding Canless Recessed Lighting
It is different from regular recessed lights. It doesn’t need a large housing or “can.” Instead, it sits flat against the ceiling, giving a smooth, modern look. This makes it ideal for homes with low ceilings or minimalistic designs. If you’re looking to update your bathroom lighting, consider the best recessed lighting for bathroom, which offers sleek, unobtrusive installation and enhances the overall aesthetic of your space.
The design is space-saving and sleek. Plus, it’s easy to install and perfect for DIY projects.
Safety First
Always turn off the power before working with lights. Switch off the power at the circuit breaker to avoid an electric shock. You can also use a voltage tester to double-check that the power is off.
Having the right tools is key. A step ladder, a screwdriver, and the new light are all you need. A voltage tester is optional but can provide extra peace of mind.
Tools You’ll Need
Here are the basic tools for the job:
- Step ladder: To reach the light.
- Screwdriver: To remove the old fixture.
- Replacement light: Make sure it fits your ceiling.
- Voltage tester (optional): To ensure the power is off.
Why Choose Canless Recessed Lighting?
This lights are energy-efficient. They use less power, helping lower your electric bill. They are also quick to install, saving time and effort.
01. Turn Off the Power
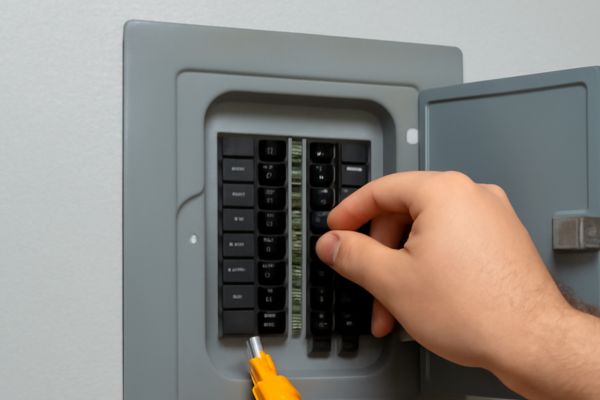
You need to turn off the power. I’ve learned the hard way that this is not a step to skip. You can easily prevent An electric shock by switching off the power at the circuit breaker. If you’re unsure, take an extra minute to use a voltage tester. It’ll tell you right away if the wires still have power running through them. Trust me, A simple check goes a long way in making you feel safe.
02. Remove the Old Canless Recessed Light
Now that the power is off, It’s time to remove the old light. This part is pretty easy, But go slow to avoid damaging the ceiling or other fixtures. Gently pull down the fixture. You might need to unscrew it first, But this should be quick. When you remove the old light, pay attention To the wiring. Use your screwdriver To carefully detach the wires. Make sure you don’t lose any small components, especially the wire nuts, Because those will be important for the new fixture.
03. Install the New Canless Recessed Light
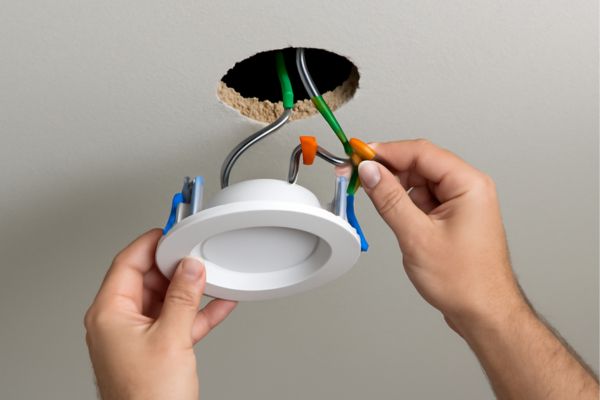
Here comes the fun part—installing the new light! Take your replacement light and align it with the ceiling. Carefully connect the wires. I always follow the color codes: black (hot), white (neutral), and green (ground). After wiring, Ensure the fixture is secure. You don’t want it to shift or fall, So make sure it’s sitting level in the ceiling. It might be tempting to rush this part, But take a moment to ensure everything is tight and secure. Improper wiring or an unstable fixture is the last thing you want!
04. Test Your New Light
Once you’ve installed the new light, It’s time To turn the power back on. This is the moment of truth! Flick the switch And see if the light comes on. If it does, Congrats—You’re done! If not, don’t panic. Check the wiring again, And make sure all connections are tight. Sometimes, The bulb may be the issue, so double-check that too. It’s always good to double-check everything before assuming something went wrong.
Practical Tips From My Experience: How to Get It Perfect
Double-Check Your Wiring
Wiring is one of the most important steps in this whole process. I can’t tell you how many times I’ve had issues with flickering lights just because the wires weren’t properly connected. Make sure you match the wires correctly, black to black, White to white, And green to the ground. If the wiring isn’t done right, Your new light may not work properly Or could cause safety issues down the line. So, always double-check before securing everything.
Choose the Right Size Light
Choosing the right size recessed light might sound like a small detail, But trust me, It makes a big difference. A fixture that’s too big Or too small won’t look right and may even cause issues with the light’s functionality. Measure the space carefully before purchasing your new light. The fixture should fit snugly in the ceiling hole And align with the surrounding area to keep things looking neat. Plus, A proper fit will help ensure optimal performance.
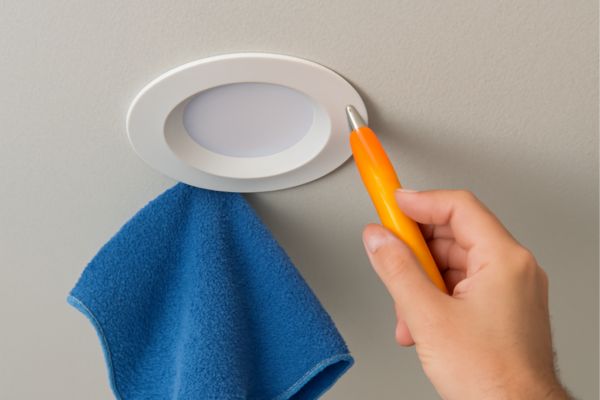
Don’t Skip the Clean-Up
Once your new light is in place, Take a few extra minutes to clean up around the fixture. Dust and debris can easily accumulate during the installation, And you don’t want them stuck around your beautiful new light. Clear the area of any mess And check that everything looks neat And safe. It’s A small step that goes A long way in making the finished project look polished and professional.
When and Why You Might Need to Replace
Signs It’s Time for a Replacement
- The Light Isn’t Working Properly: If the light flickers or dims, It might be failing. This could mean the bulb Or fixture needs replacing.
- Outdated or Mismatched Fixtures: Over time, Fixtures can look old or mismatched. Replacing them With modern lights can help update your home.
- Wear and Tear from Years of Use: With age, Fixtures may get damaged or stop working. If your light is old, It may be time for a new one.
How to Change the Light Bulb in Recessed Lighting

Changing the bulb is easy. Here’s how:
- Turn off the Power: Always turn off the power before replacing the bulb.
- Remove the Old Bulb: Twist the bulb counterclockwise To remove it.
- Insert the New Bulb: Twist the new bulb clockwise into place.
- Test the New Bulb: Turn the power back on And check if the light works.
Types of Canless Recessed Lighting and When to Use Each
LED vs. Halogen Canless Recessed Lights
- LED Lights: LEDs use less energy And last longer. They cost more initially but save you money on your electric bill. The downside is the higher upfront cost.
- Halogen Lights: Halogen bulbs are bright and produce a warm light. However, they use more energy And burn out faster. They are cheaper At first but cost more over time.
Which One to Choose
- Energy Efficiency: LEDs are the most energy-efficient option. They consume less power, Which lowers your utility bill.
- Brightness: Halogen lights are brighter. They may be a better fit for areas that need extra light, Such as kitchens.
- Cost: LEDs are more expensive to buy, But they save you money in the long run. Halogen lights are cheaper upfront but have higher operating costs.
When to Use Canless Recessed Lighting
It works well in various spaces:
- Kitchens: These lights provide great task lighting. They fit perfectly in the ceiling And help light up work areas.
- Bathrooms: Canless lights are ideal for bathrooms, Offering modern style And efficient lighting.
- Living Rooms: Use them in living rooms to add a sleek, Clean look without taking up too much space.
Conclusion
It is a great choice for any home. It offers sleek design, Energy efficiency, And saves space. Plus, replacing your old lights is easier than it may seem. With just a few basic tools, You can tackle this DIY project on your own.
Even beginners can achieve great results with the right steps and a little patience. So, Give it a try! You’ll be surprised At how simple and satisfying it is to replace.