
How to replace a floor lamp cord is a common question many people search after noticing flickering lights, sparks, or damaged wiring near the plug. I dealt with this problem myself after my favorite living room lamp started turning off every time the cord moved slightly. At first, I thought the bulb was failing, but the real issue was the old worn-out cord hidden inside the lamp base.
The good news is that replacing a floor lamp cord is usually easier than people expect. With a few simple tools and careful steps, you can repair the lamp safely at home instead of throwing it away or buying a new one.
Why Floor Lamp Cords Need Replacement
Floor lamp cords wear out over time because they bend, twist, and stay plugged in for years. Pets, furniture movement, and foot traffic can also damage the insulation around the wire.
Common signs of a bad floor lamp cord include:
- Flickering light
- Sparks near the plug
- Burning smell
- Exposed wiring
- Lamp turning off randomly
- Warm or melted plug area
Ignoring these warning signs can become dangerous. A damaged lamp cord may cause electrical shock or even a house fire.
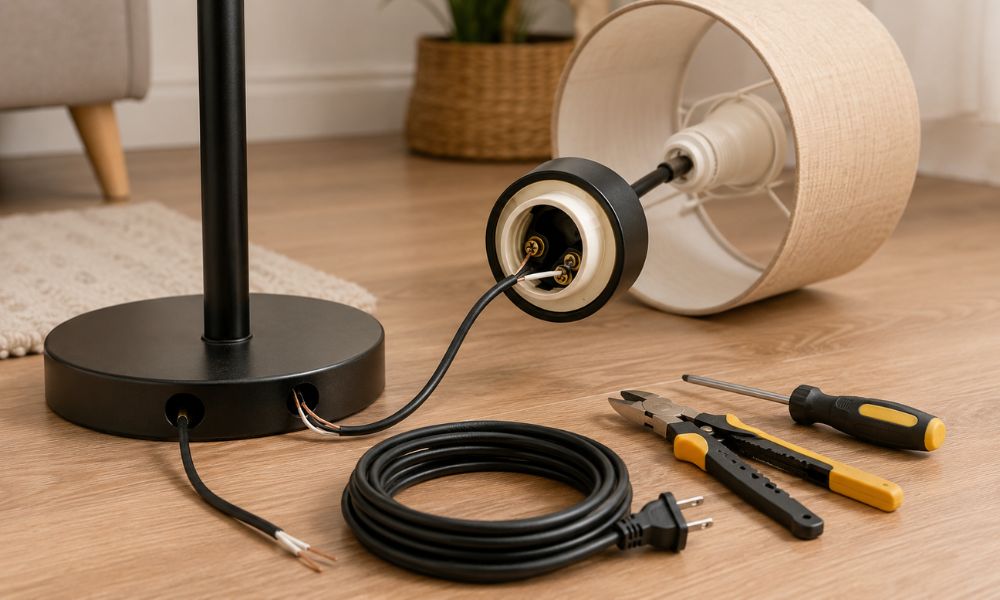
Tools Needed To Replace A Floor Lamp Cord
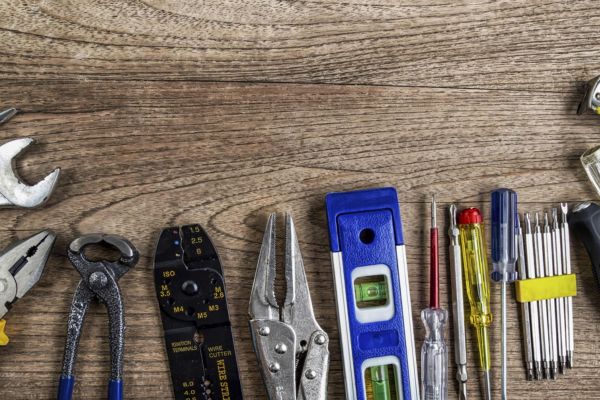
Before starting, gather all tools in one place. This makes the repair process much smoother.
You will usually need:
- Replacement floor lamp cord
- Screwdriver
- Wire cutters
- Wire stripper
- Electrical tape
- Replacement plug if needed
- Needle nose pliers
Most hardware stores sell lamp repair kits with cords and plugs already included.
Choosing The Right Replacement Lamp Cord
Not all lamp cords are the same. Picking the correct one matters for safety and performance.
Look for a cord that matches:
- Lamp wattage
- Cord length
- Plug type
- Color style
- Indoor usage rating
A polarized lamp cord is usually the safest choice for modern floor lamps. One side of the plug is wider and helps reduce electrical risk.
Unplug The Floor Lamp First
Safety always comes first during electrical repairs.
Never work on a lamp while it is plugged into the wall. Even a switched-off lamp may still carry electricity through the cord.
Place the lamp on a flat surface where you can easily access the base and socket area. Good lighting also helps during small wire connections.
Remove The Old Floor Lamp Cord
Most floor lamps allow the cord to slide through the center pole.
Start by removing the lampshade and bulb. Then carefully open the socket housing near the top of the lamp.
Inside the socket, you will see two wire connections attached with screws. Take a photo before disconnecting anything. This makes reassembly easier later.
Loosen the screws and remove the old wires. Next, gently pull the old cord out through the bottom of the lamp base. Choosing the right lighting setup also matters after repairing a lamp. This guide on floor lamp vs table lamp explains the differences and helps you pick the best option for your space.
How To Thread The New Lamp Cord
Threading the new cord can sometimes feel tricky, especially with tall floor lamps.
A simple trick is attaching the new cord to the old cord before pulling it out. This helps guide the replacement wire through the pole smoothly.
If the old cord is already removed, you can use:
- Thin string
- Flexible fish tape
- A small weighted wire
Pull slowly to avoid damaging the new cord insulation.
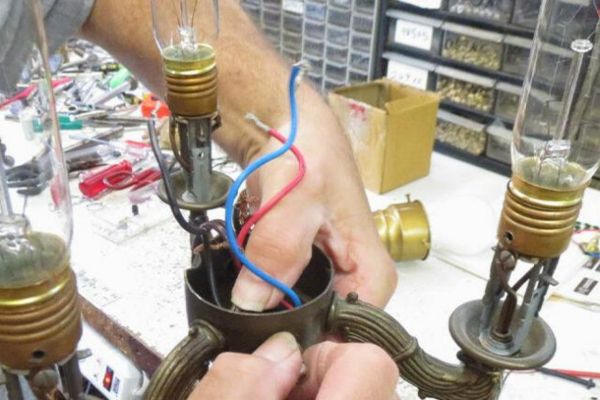
Connecting The New Floor Lamp Cord

Once the cord reaches the socket area, separate the two wires carefully.
Use a wire stripper to expose a small section of copper wire on both ends.
Most lamp cords have:
- Neutral wire
- Hot wire
The neutral wire usually connects to the silver screw. The hot wire connects to the brass screw.
Wrap the exposed wire clockwise around each terminal screw and tighten firmly.
Loose connections can cause flickering or overheating later.
Reassemble The Lamp Socket
After connecting the wires, place the socket housing back together carefully.
Make sure:
- No copper wire is exposed
- Wires are not pinched
- Socket snaps securely into place
Then reinstall the bulb and lampshade.
Before plugging the lamp back in, inspect the entire cord one more time for twists or damage.
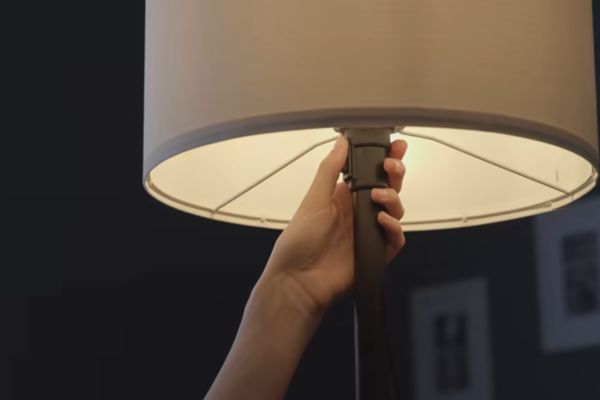
Testing The Repaired Floor Lamp

Now comes the satisfying part.
Plug the lamp into a working outlet and switch it on. The light should turn on smoothly without flickering, buzzing, or sparks.
Touch the plug lightly after a few minutes. It should stay cool during normal use.
A properly installed lamp cord should feel secure and stable.
Common Mistakes During Lamp Cord Replacement
Many beginners rush the repair and create small problems without realizing it.
Here are common mistakes to avoid:
Using The Wrong Cord Type
Thin cords may overheat with higher wattage bulbs.
Loose Wire Connections
Loose terminal screws can cause flickering lights and electrical arcing.
Forgetting Polarized Plug Direction
Incorrect wiring may create shock hazards.
Damaging The Wire Insulation
Sharp metal edges inside the lamp pole can scrape the cord.
Taking your time prevents most of these issues.
Can You Replace A Floor Lamp Cord Without Electrical Experience?
Yes, many simple floor lamp repairs are beginner friendly.
I remember being nervous the first time I repaired a lamp cord. After following each step slowly, the repair turned out much easier than expected.
Still, some lamps have complicated dimmer systems or built-in LED parts. Those may require professional help.
Call an electrician if you notice:
- Burned socket parts
- Melted internal wiring
- Heavy sparking
- Strong burning smell
- Broken internal switch mechanisms
How Long Does A Floor Lamp Cord Last?
A quality lamp cord can last many years with proper care.
Cord lifespan depends on:
- Daily usage
- Cord bending
- Heat exposure
- Pet damage
- Storage conditions
Avoid wrapping cords tightly around the lamp base. This creates stress near the wire ends.
Tips To Protect Your New Lamp Cord

After replacing the cord, a few habits can help it last much longer.
Keep The Cord Away From Walkways
Foot traffic slowly weakens internal wiring.
Avoid Overbending
Sharp bends near the plug often cause internal wire breaks.
Use Proper Bulb Wattage
Overpowered bulbs generate excess heat inside the lamp.
Clean Dust Regularly
Dust buildup around sockets may trap heat.
Small maintenance habits help prevent future repairs.
Best Bulbs To Use After Replacing A Lamp Cord
Modern LED bulbs work especially well with repaired floor lamps.
LED bulbs:
- Produce less heat
- Use less electricity
- Last longer
- Reduce stress on wiring
Warm white LED bulbs create a cozy lighting effect for living rooms and bedrooms.
Floor Lamp Safety Checklist
Before using your repaired lamp daily, check these safety points:
- Cord feels secure
- Plug fits tightly
- No exposed wires
- Lamp stays stable
- Socket does not overheat
- Switch works smoothly
A quick safety check gives peace of mind.
Final Thoughts
Learning how to replace a floor lamp cord can save money and extend the life of a favorite lamp. Many lamps only need a simple cord replacement instead of complete replacement.
The first time I repaired a floor lamp cord, I expected the process to feel difficult. Instead, it became one of the easiest home repairs I had done. With patience and proper safety steps, most people can handle this repair at home.
A newly replaced cord not only restores lighting but also makes the lamp safer for everyday use.