
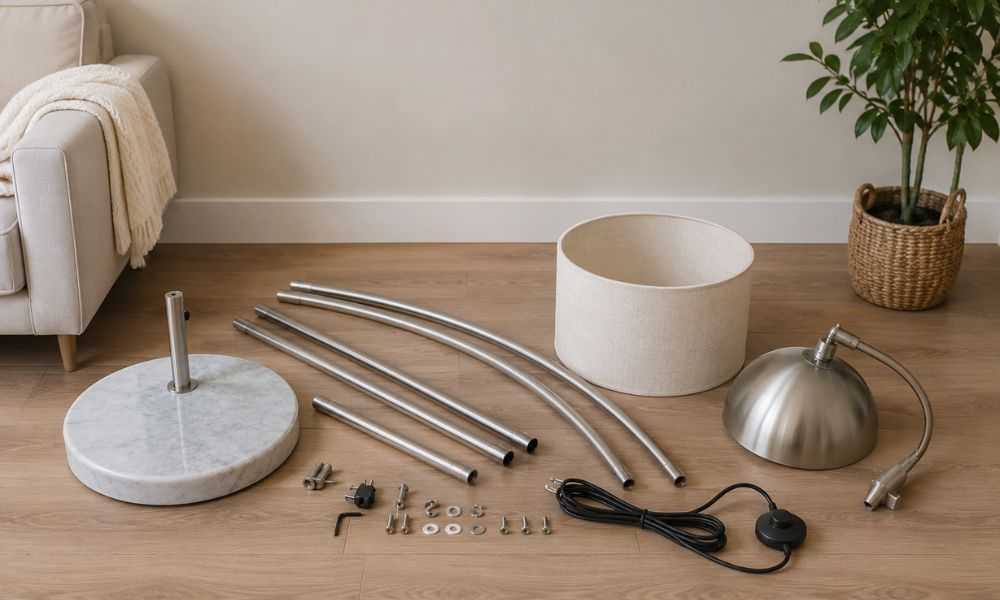
Learning How To Assemble Arc Floor Lamp models properly can save time, improve stability, and help your room look more stylish. Arc floor lamps are popular because they provide overhead lighting without requiring ceiling fixtures. Their curved shape creates a modern appearance that works beautifully in living rooms, bedrooms, and reading corners.
The first time assembling one may feel confusing because the curved arm, wiring, and heavy base usually come in separate sections. However, most arc floor lamps are actually easier to set up than they appear. With careful assembly and patience, the entire process usually takes less than an hour.
Why Proper Arc Floor Lamp Assembly Matters
Arc floor lamps are designed differently from standard standing lamps because their curved arm extends outward from the base. This creates additional pressure on the lower section of the lamp. If the connections are loose or uneven, the lamp may lean, wobble, or become unstable over time.
A properly assembled lamp stays balanced and keeps the internal wiring protected. It also improves lighting direction and helps the lamp last longer. Many people rush through the setup process and later notice the curved arm slowly leaning to one side. Taking extra time during assembly helps avoid those problems.
Prepare Your Tools Before Starting

Most arc floor lamps include the hardware needed for assembly, but keeping a few basic tools nearby can make the process easier. A small screwdriver, a wrench, scissors, and a soft cloth are usually enough for most models.
Some modern lamps also include an Allen key for tightening screws. Preparing the tools first prevents interruptions later and helps the assembly process move more smoothly.
Check All Parts Carefully
Before assembling the lamp, remove every piece from the box and place them carefully on the floor. Most arc floor lamp packages include a heavy base, several pole sections, the curved arm, a lamp shade, hardware pieces, and the electrical cord.
Checking every component before starting helps confirm nothing is missing. Small screws and washers are sometimes hidden inside foam packaging, and missing one small piece can affect the lamp’s stability later.
Choose The Right Area For Assembly
Arc floor lamps can become difficult to move after assembly because of the heavy base and long curved arm. Setting up the lamp close to its final location makes the process much easier.
Choose a clean, open area with enough space to fully extend the curved arm during assembly. Hard flooring usually works better than thick carpet because it keeps the base stable while connecting the sections.
Good lighting also helps when tightening screws and guiding the wiring through the poles.
Assemble The Heavy Base First
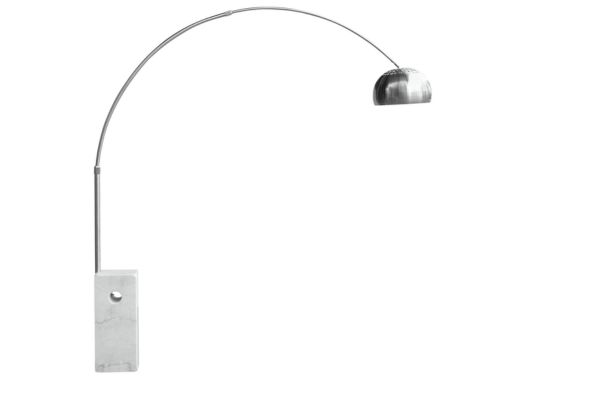
The base is the most important part of the lamp because it supports the entire curved structure. Most arc floor lamps use heavy marble, metal, or weighted concrete-style bases to prevent tipping.
Attach the bottom pole section directly into the base and tighten it carefully. The connection should feel secure but not excessively tight because overtightening can damage the threading inside the pole.
After attaching the base, the lamp should already feel stable and upright.
Connect The Pole Sections
Most arc floor lamps include multiple pole pieces that screw together to create height. Connect each section slowly while keeping the internal wire straight and untangled.
Careful alignment matters during this step because uneven pole connections can cause the upper curve to lean later. Thread each section gently and tighten it evenly without forcing the connection.
A straight and balanced center structure helps support the curved arm properly once installed.
Attach The Curved Arc Arm
The curved section creates the signature overhead lighting effect that makes arc floor lamps unique. This part is often the largest and heaviest section of the lamp.
Carefully connect the curved arm to the upper pole while supporting its weight with one hand. Never allow the curved section to hang freely before tightening the connection fully.
Some lamps use twist-lock systems while others use locking screws or push-pin connectors. Make sure the curved arm extends outward away from the weighted base so the lamp remains balanced.
Organize The Electrical Wiring
One common mistake during assembly is pinching the electrical cord inside the pole sections. Carefully guide the wire through the lamp structure while keeping it smooth and untangled.
Avoid sharp bends or twisted wiring because damaged cables can create electrical issues later. If the cord feels stuck inside the pole, never pull aggressively.
Proper wiring keeps the lamp safer and helps prevent future power problems.
Install The Lamp Shade
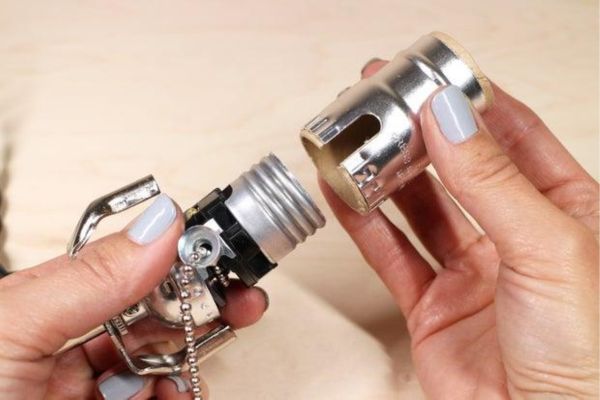
Arc floor lamp shades come in many styles, including fabric drum shades, metal dome shades, and glass designs. Attach the shade carefully to avoid damaging the socket area.
Some shades use screw rings while others attach with clips or harp fittings. Tighten the shade gently until it feels secure.
A properly attached shade helps distribute light evenly and improves the overall appearance of the lamp.
Insert The Light Bulb
Before installing the bulb, check the lamp’s recommended wattage. LED bulbs are usually the best choice because they use less electricity, produce less heat, and last longer than older bulb types.
Warm white LED bulbs create a softer and more relaxing atmosphere, especially in living rooms and bedrooms. Avoid oversized bulbs that touch the inside of the shade because excess heat can damage the material over time.
Test The Lamp After Assembly
After connecting all sections, plug the lamp into a nearby outlet and test the power switch. Check the brightness, balance, and stability carefully before placing the lamp permanently.
If the lamp leans or wobbles slightly, recheck the pole connections and tighten any loose sections. A stable arc floor lamp should feel balanced even when lightly touched.
Testing the lamp early helps identify problems before the setup is completely finished.
Common Arc Floor Lamp Assembly Problems
One common issue is the lamp leaning to one side. This usually happens because one pole section is uneven or not fully tightened. Carefully reconnecting the sections often solves the problem.
Another common issue is a loose curved arm. This can happen if the upper connection is not tightened completely. Supporting the arm while tightening usually fixes the instability.
Some arc floor lamps may wobble slightly on thick carpet because the heavy base sinks unevenly into soft flooring. Moving the lamp to a firmer surface often improves stability.
Safety Tips During Assembly
Arc floor lamps can become dangerous if assembled incorrectly because of their extended curved structure. Always keep children away during assembly and avoid dragging heavy marble bases across the floor.
Use the recommended bulb wattage and keep the lamp away from curtains or flammable materials. Modern LED bulbs are safer because they produce far less heat than older halogen bulbs.
Inspecting the wiring carefully during setup also helps prevent electrical issues later.
Best Places To Put An Arc Floor Lamp

Arc floor lamps work beautifully behind sofas, beside reading chairs, and over coffee tables. Their curved design allows light to extend across seating areas without needing overhead fixtures.
These lamps are especially useful in rooms without ceiling lighting because they create soft overhead illumination while adding decorative style.
Some people also combine arc lamps with softer ambient lighting for a more balanced room design. Smaller spaces may benefit from standard standing lamps instead. This comparison between floor lamps and table lamps explains the differences clearly: floor lamp vs table lamp
How Long Arc Floor Lamp Assembly Takes
Most basic arc floor lamps take around 20 to 30 minutes to assemble. Larger multi-arm designs may require closer to an hour because of the additional adjustments and hardware.
The heaviest and most difficult part is usually positioning the weighted base safely without damaging the floor.
Working slowly and carefully often produces the best results.
Maintenance Tips After Assembly
After setup, occasional maintenance helps keep the lamp stable and looking new. Tightening loose connections every few months helps prevent wobbling caused by the weight of the curved arm.
Cleaning the shade regularly and checking the wiring also improves the lamp’s lifespan. Heavy curved structures naturally loosen slightly over time, so regular inspections are helpful.
Replacing old bulbs early also keeps the lighting consistent and safe.
Final Thoughts
Learning how to assemble arc floor lamp models properly makes the setup process much easier and safer. Most lamps only require careful alignment, proper tightening, and patience during assembly.
Once fully assembled, an arc floor lamp provides beautiful overhead lighting while adding a modern decorative touch to almost any room. Proper setup also helps prevent leaning, instability, and electrical problems later.