
I still remember the first time I decided to install recessed lights in my living room. I was tired of the old, bulky ceiling fixtures that seemed to take up all the space and distract from the room’s charm. After a little research, I found out that installing recessed lights with friction clips would make the process so much easier—no tools, no hassle. In this article, I’ll walk you through how to install recessed lights with friction clips, so you can brighten up your home easily and give it that sleek, modern touch.
What Are Recessed Lights?
They sit flush, Unlike traditional that hang down. I first discovered them while redesigning my living room, aiming for a modern, Minimalist look. They provide soft, Even light without the bulk of traditional fixtures.
These lights work well in many areas of your home. Install them in kitchens, living rooms, Or bathrooms. In kitchens, they are perfect above counters or islands. In living rooms, they create a clean, spacious feel without drawing attention to the light fixtures.
Why Choose Friction Clips for Recessed Lights?
They are a game-changer in recessed light installation. I was amazed at how simple they made the process. These clips hold your lights securely in place without any tools.
The best part? They are quick and easy to use. Simply snap the clip into position, and the light stays firm. No screws, no hassle.
They also save time. They speed up the whole installation process, making it faster than traditional methods. Plus, they work perfectly every time, ensuring a secure fit without any risk of the light falling.
Materials You’ll Need for Installation
Before you begin, gather all the necessary tools. Having everything ready makes the job easier and quicker. Here’s a list of the materials you’ll need:
- Recessed Light Fixtures: Choose compatible fixtures.
- Friction Clips: These clips hold the parts firmly in place without tools.
- Wire Strippers: You need these to strip the insulation off wires.
- Screwdriver: A basic screwdriver is useful for tightening wire nuts.
- Drywall Saw or Hole Saw: Use this to cut holes for the lights in your ceiling.
- Tape Measure: Measure carefully to place the lights correctly.
- Wire Nuts: These are used to securely connect the wires.
- LED Bulbs: Make sure the bulbs match your recessed fixtures.
01. Choose the Right Placement
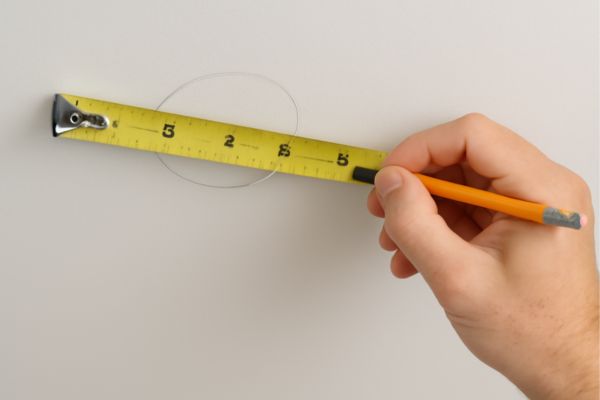
Start by deciding where you want to place your lights. Measure carefully to ensure they Are spaced evenly. Use a tape measure To mark the spot where each light will go.
02. Cut the Ceiling Holes
Next, use a drywall saw or hole saw to cut holes in the ceiling. Make sure the holes are the right size for the light fixtures. Check the measurements twice to ensure a perfect fit.
03. Wire the Light

Strip the insulation off the wires with a wire stripper. Connect the wires from the light fixture to the ceiling wires. Use wire nuts to secure the connections. Be sure the wires are tightly connected for safety.
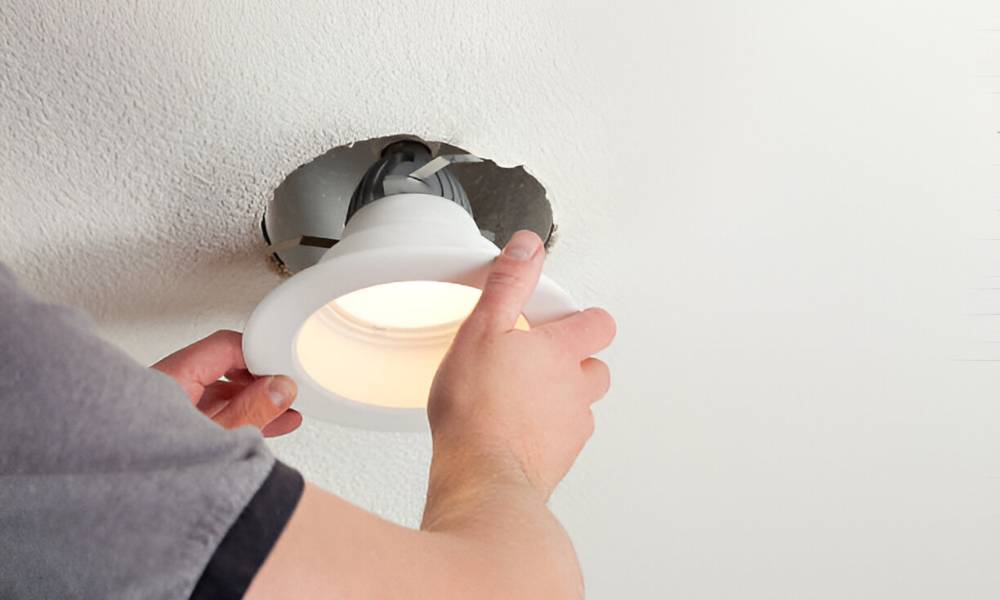
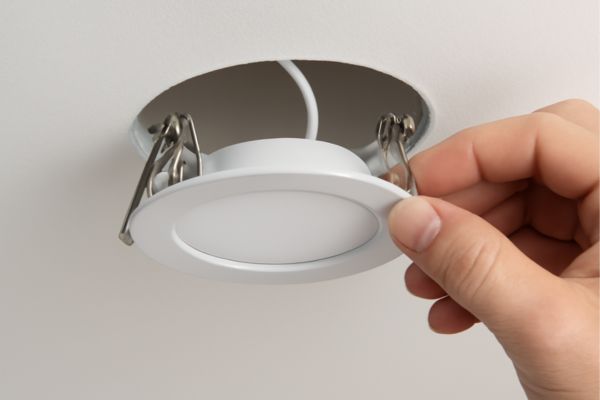
04. Attach the Friction Clips
Now, Take your clips and attach them to the light fixture. The clips will snap into place, holding the light securely. No tools required—just click and secure the light easily.
05. Test the Lights
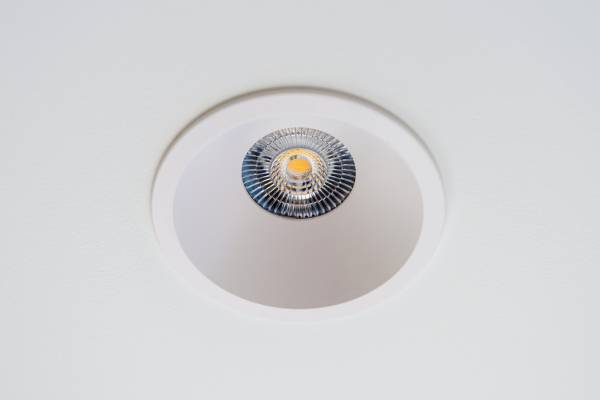
Once the lights are in place, turn them on. Check to make sure they are working properly. If everything is good, you’re done! Looking for pricing? Check out the best recessed lighting for bathroom for a detailed breakdown of costs and factors to consider before you start your project.
Tips for Perfect Installation
These tips will make the process even smoother.
- Double-check the wiring: Take a moment to inspect the wiring. Ensuring everything is correctly connected will save you time and frustration later.
- Take your time cutting the ceiling holes: It’s tempting to rush, but cutting the holes carefully is key. A neat, clean cut will help the lights fit perfectly and look professional.
- Use a chalk line for multiple lights: If you’re installing several lights, use a chalk line to mark the placement. This keeps them aligned and evenly spaced, giving the setup a polished look.
Types of Recessed Lights: When to Use Each

- LED: These are the most energy-efficient option. They last longer and consume less power, making them a great choice for larger spaces or areas where lights will be on for extended periods, like living rooms or kitchens. Plus, LED fixtures are compatible with clips, making them easy to install.
- Halogen: Halogen bulbs provide a brighter, whiter light than LED bulbs but use more energy. They work well for task lighting, like above kitchen islands or reading areas, where bright, focused light is essential. They also work well with friction clips for quick installation.
- Incandescent: These provide a warm, soft light that creates a cosy atmosphere. They are best used in smaller rooms or areas where you want a more relaxed, ambient glow. Although not as energy-efficient as LEDS, they still offer good lighting for living rooms or bedrooms.
Troubleshooting Common Issues
Friction Clips Don’t Fit
If the friction clips don’t fit, It’s usually because the hole is too small. Measure the hole size again and ensure it matches the recommended size for your fixture. You can use a drywall saw to carefully widen the hole if needed. If the clips still don’t fit, consider trying a different type of clip or securing the light with a mounting bracket.
Wiring Problems
Make sure to turn off the power before you start. Use a voltage tester to ensure the wires are not live. Strip the wire insulation carefully and connect the wires tightly with wire nuts. Avoid leaving any exposed wires. If you’re unsure about the wiring, it’s always best to consult a professional.
Conclusion
Using friction clips for installing makes the process quick and simple. They eliminate the need for tools, ensuring your lights stay securely in place with minimal effort. This method is efficient and hassle-free, making it perfect for beginners.
Don’t be afraid to try it yourself. The satisfaction of completing the project and seeing your space brighten up is truly rewarding.