
The first time I added LED strip lights to my room, they started peeling off by morning. I pressed, I patched, I even used tape—but nothing lasted. It took me months to learn the tricks that work. In this guide, I’ll share exactly How to get Led strip lights to stay Up, without the stress. You’ll learn what tools help, what surfaces matter, and which products stick best. I’ll also show you a few of the best LED strip lights for bedroom glow-ups that hold strong. Let’s turn your space into a room that shines—and stays that way.
Know Your Surface: The Foundation for Sticking Success
Not every surface holds well. Before sticking anything, check the area. A bad surface is the top reason strip lights fall fast.
Smooth and dry spots work best. Painted walls, metal frames, and finished wood all do great. I’ve had strong results with headboards and shelf edges.
Some spots just don’t work. Avoid dusty wood, soft wallpaper, or bumpy textures. Moisture and dirt weaken the glue. The lights drop by the next day.
Clean the area before you start. Use rubbing alcohol and a cloth. Wipe the spot once and let it dry. This small step makes a big difference.
How to Get LED Strip Lights to Stay Up (Step-by-Step Guide)

You’ve cleaned your surface. Now it’s time to stick those lights the right way. This part is where most setups either shine or sag.
Step 1: Wipe Down with Rubbing Alcohol
Start with a clean cloth and rubbing alcohol. Gently wipe the full length of the surface. This removes dust and oil you can’t always see. The cleaner the spot, the better the grip.
Step 2: Wait Until Fully Dry
Give it a minute to air dry. Touch the surface to check. It should feel smooth and dry, not damp or cold. Don’t rush this part.
Step 3: Use the Built-In Adhesive First (Test It)
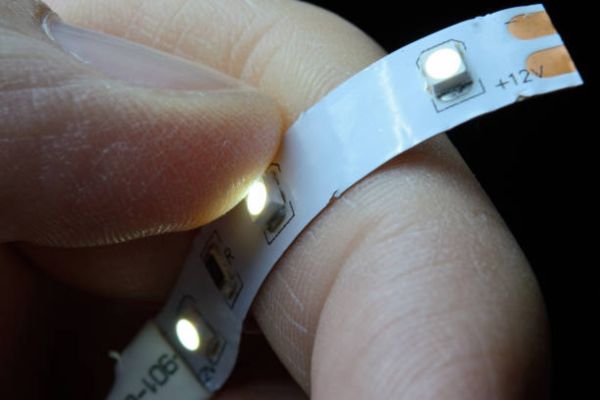
Most LED come with a sticky back. Peel the cover slowly and press a small section into place. Hold it there for a few seconds. This test helps see how well it sticks on its own.
Step 4: Press Firmly and Evenly During Installation
Now press the rest of the strip down, a few inches at a time. Keep your pressure even. Use both thumbs. This helps seal the glue flat and tight to the surface.
Step 5: Reinforce with Extra Adhesive Options (If Needed)
Not all strips stay put forever. For a stronger hold, add clear mounting tape, cable clips, or Velcro tabs. These help your lights last longer, especially in corners or warm spots.
Tips from Real Experience: What I Learned After 5 Bedrooms
My first setup looked great—until it didn’t. The lights started drooping by day three. I pressed them back, used random glue, even tried thumbtacks. None of it worked for long.
I’ve tested different methods over the years. The combo that never fails? Clean the surface, use double-sided tape, and add a few adhesive clips. It takes more time, but it lasts for months.
Corners used to drive me nuts. The strip would lift or fold awkwardly. Now I cut at the bend and reconnect with corner clips or soft curves. It looks smooth and holds better.
On average, a good setup holds for six months or more. After that, I check the edges. If anything feels loose, I re-tape the weak spots.
Choosing the Right Product: Best LED Strip Lights for Bedroom Use
Some LED strips are easier to work with than others. A good one sticks well, bends with ease, and lasts long. A bad one peels fast and wastes your time.
The best strips have strong backing, clear instructions, and soft, flexible material. Good brands also include better glue and safer wiring. Reviews help too. You learn what real people liked—or didn’t.
I’ve tested many brands. Govee is a top choice for smooth installs and great color. Philips Hue works well with smart homes and gives a soft, clean glow. Daybetter is a solid budget pick that still holds tight.
Placement Matters: Where to Stick for Long-Lasting Results
Good placement helps lights stay up longer. The less stress on the strip, the better the hold. Stick to flat areas where nothing pulls or bends the strip too hard.
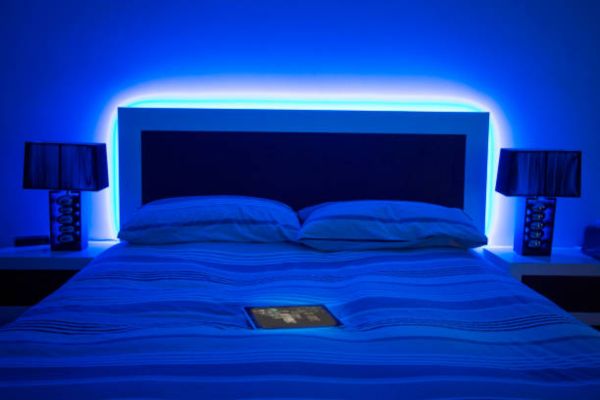
Under bed frames is a great spot. The light stays hidden, and the frame gives solid support. It adds a soft glow and makes the whole bed float.
Behind headboards also works well. It gives a cozy, warm feel. The wall stays clean, and the strip stays safe from dust and hands.
Ceilings and shelves offer perfect straight lines. The surface is smooth, and the height keeps the strip safe from bumps. The light spreads wide and fills the room with color.
Mirrors and dressers need care. Make sure the edges are clean and dry. Stick near the back or the frame, where the strip is out of sight but still shines bright.
Avoid These Common Mistakes

It’s easy to mess up the first time. I did. Most people do. But once you know what to avoid, the setup becomes smooth.
Don’t rush. Take your time. Line things up before peeling the backing. A calm install lasts much longer than a fast one.
Heat and moisture ruin the glue. Hot rooms or damp walls make strips fall fast. Choose a cool, dry time to set everything in place.
Always test your lights first. Plug them in. Check the color and length. Fixing problems later is harder once they’re on the wall.
Corners can cause tension. The strip may bend too tight or lift at the edge. Use gentle curves or corner clips to spread the strain.
Maintaining Your Setup Over Time
Even a great setup needs a little care. I check my lights once every few weeks. It only takes a minute, but it helps them last longer.
Look at the ends and corners. Are they loose? Is the strip peeling off? These are signs you may need fresh tape or another clip. To clean the area, use a soft cloth. Wipe around the strip, not across it. Avoid strong cleaners—they can weaken the glue or damage the strip.
Final Thoughts
Getting it right feels easier than it looks. Once you clean the surface, place the lights well, and support them with good tools, it all falls into place. Even as a beginner, you can get a setup that lasts.
Try a small spot first. Test the tape. Try a few corners. Each time you adjust, you learn something new. Those small changes make a big difference.
With the best LED strip lights for bedroom use, things stick better and glow longer. A good product gives you a great head start.