
I love our new chandelier! It looks amazing in the dining room, and I get a lot of praise for it. Although it has a bit of a bad side. The bulbs are tightly packed together and you don’t want to risk breaking the glasses. If you have a high ceiling, you may have noticed this problem. Replacing light bulbs is more complicated than necessary. This post is about how to change chandelier light bulbs in high ceilings. I will tell you why it is a bad idea to change these without proper assistance. It happened to me and it cost me a fair amount of money. I don’t want it to happen to you or your home.
Let’s deal with it. Make sure you get the most out of your fixtures. The first step is to remove the old chandelier from your roof. Once you have lowered the old one, you can take the new one and attach it with a bolt or a bracket. Replacing light bulbs or fluorescent tubes in high ceilings is not easy. In most cases, you need special lighting and a ladder. Lay it down on a wall or strong counter surface for easy access to the bulb.
Using the highest ceiling fan for those who want to heat a decent level space, yet do not need a strong fan. Those who think that medium size is too small and large open space should choose a high ceiling fan. However, high ceiling fans have the disadvantage that they are generally less power-efficient than other types of fans.
Make a plan
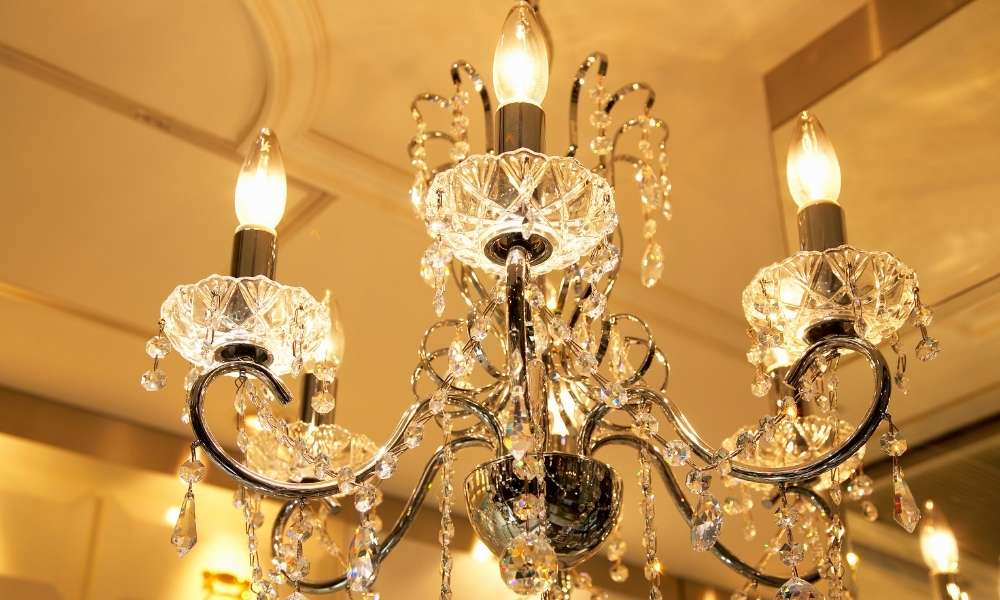
From a family with a rich history of premium lighting, this stunning chandelier has a bold, attractive look with three low-hanging light bulbs and a cluster of crystal buttons hanging from its center. Mount it at your entrance or fountain to create an eye-catching first impression.
To replace illumination bulbs in high-ceiling fixtures, it is important to prepare ahead of time and make sure you have everything ready. This way the bulb can be switched on safely and efficiently. First, gather all the tools you need to get the job done.
Before you get off the ladder, take stock of what you need to work on. The plan should include a safe way to access fixtures and a safe place for light bulbs. Consider such a solution where you install a pulley system.
Turn off the electricity that gives power to the chandelier
Turn off the electricity that gives power to the chandelier. Replace any chandelier with a high ceiling when the power goes off. With just a few tools and some patience, anyone can replace bulbs in this type of lighting fixture. Pull the small grounding wire from the light socket until you can reach it from your ladder. The position of this small wire varies between chandeliers. But it will always be connected to a small connection inside the chandelier. This process is basically about how to change chandelier light bulbs in high ceilings.
Wear a pair of safety goggles
The most important safety precaution you can take when replacing chandelier light bulbs in high ceilings is to wear proper safety equipment to protect your eyes. A pair of safety goggles will protect you from being knocked down by falling glass if the bulb slips or explodes from your finger.
Climb where you can see the bulbs
Climb where you can see the bulbs. High ceilings are beautiful, but sometimes need to change the classic globe on a chandelier. With a little creativity, you can make that difficult task easier and safer. First, you need to make sure your ladder is set up correctly. You will want to position it in such a way that it gets firm with an accessible angle.
The angle at which you see the bulbs will determine how easy it is to safely change them. Place your ladder in such a way that the light bulb line is perpendicular to your vision. If a ladder is not long enough, use a stabilizer such as a cross beam or an extension ladder. If you install a new chandelier on your own, be sure to take extra care.
Find a flashlight that hangs over your head or has a hands free clip
Replacing light bulbs in high ceilings is often an awkward and frustrating ordeal. This guide offers creative solutions to make it easier to replace high ceiling illumination bulbs using a flashlight hanging over your head.
The hands-free option means you can hold the illumination on your face while working. Creating a temporary stand with a variety of household items is probably the easiest way to deal with this task. Look for a sturdy chair that can support the weight of both your ladder and your body. Other good candidates for temporary ladders include tables, stools and other chairs. But it can be difficult when you are trying to reach a height of 20 feet or more. If you are looking for an easy way to replace your chandelier light bulbs, consider hanging a flashlight from the hook in the middle of your chandelier.
Use a tool to loosen the bulb, such as a pole or suction cup bulb changer
When it comes time to replace the old bulbs in your chandelier, you may have a hard time getting to them. You probably don’t want to call a maintenance service for this reason, and you don’t need to. You can use a combination of a pole and a suction cup bulb changer to replace light bulbs in a chandelier with a high ceiling without removing the chandelier.
If you have trouble replacing a light bulb in a high ceiling, use a tool to loosen the bulb. Such as a suction cup or telescoping pole. A suction cup bulb clamps on the changer bulb and twists it until it loosens from the socket. A telescoping pole should be long enough to reach the top of your head. Attach a chisel to the end of the pole and twist to release the bulb from the socket.
Always use a light bulb that fits your fixtures
Replacing light bulbs with high-ceiling chandeliers or fixtures is no small task. Height is challenging, but it is difficult to replace actual bulbs due to awkward angles and generally compressed space. My first step when replacing a illumination bulb in a high ceiling fixture is to measure the base circumference of the light bulb socket. This allows me to determine what size bulb fits.
If you want to keep the bulb open so that you can appreciate its beauty, replace any custom shades with ones that allow a lot of light to shine. With a heat lamp bulb, use a glass bowl or cone-shaped shade and make sure it is at least 300mm away from the fixture. Bulb wattages also need to be factor: Larger shade fixtures require higher wattage bulbs as recommended by the manufacturer.
Take out a bulb from your chandelier and note the base type, type and wattage of the bulb
To move and replace a light bulb burning in a chandelier, wear gloves to protect your fingers and turn off the power before proceeding. Remove the bulb cover or candle cup to expose the bulb, using two persons. Take out one of the burned bulbs with the pinch, aiming at the base type, type and wattage so you know what kind of replacement is needed.
When a light bulb goes into your chandelier and the fixture is 20 or 30 feet above the ground. It is not as easy as replacing the bulb. If you do not have a ladder that is high enough to reach the fixture, you may need to call a professional lighting installer to replace the bulb for you. But first, before you call a repairman, see if any of your family or close friends or neighbors own one of those stretched ladders. You can only find someone who can help you with this task.
Buy a new package of light bulbs that matches your chandelier removal
If you want to replace the light bulbs in a chandelier hanging from the ceiling, you need to do some extra work. You can reach your illumination bulbs. In many cases, light bulbs are placed under a chandelier by a locking ring. The process is frustrating. Because you may fall off standing furniture. So stay tuned for how to change chandelier light bulbs in high ceilings.
Chandeliers can become an everyday fixture in your home as you decorate to inspire. Before you know it, however, light bulbs can burn and burn faster, depending on the type of light used.
Reach for the chandelier and pull out its old light bulbs.
To install an LED bulb you need to remove the incandescent bulbs from the chandelier. Some people use a ladder for this work, but if you don’t want to worry about how long your ladder is, then the poles of a telescoping painter are a solid investment. The tool will be useful during other home repair work. So, its price is also sufficient. To start, turn off the power to the circuit breaker.
Make sure it is safe to replace the bulbs safely. Place a drop cloth on the floor under the fixture to protect your floor and/or furniture if you accidentally drop something while working. Use a stool or step ladder if necessary to reach your LED bulbs. If you are working with a light that has already been converted to LED when you push the new bulbs and none of them seem to fit. Check for a metal prong called an adapter stuck inside the socket. Remove it before inserting your new bulb.
Once you have removed the old light bulbs, replace them with new ones
Before you start replacing the light bulb in your chandelier, you need to turn off the power. Gently pull the cover down and remove the chandelier cover, making sure it doesn’t fall off. Turn the old bulbs clockwise and then unscrew the socket from the socket. After that, you need to connect a new light bulb in place and make sure it works properly. Trying to change illumination bulbs in high ceilings but you know it’s not an easy task. As a result, air can be polluted by dust, debris and dust mites. This is why you must always wear an anti-dust and anti-sneeze mask before you start cleaning your chandelier.
Turn your new light bulbs clockwise and screw them gently.
It is difficult to open a light bulb on a high ceiling, mainly. Because the bulb is not always in a convenient location. If the fixture you are trying to screw is located too high or if you are trying to unscrew a fixture. This is not easily accessible, you may need to use a light bulb changer. Turn the tools clockwise and gently screw the bulbs. Grab the bulb you have removed and carefully unscrew it counterclockwise.
Once all your new light bulbs have been screwed on, turn on your electricity to test them
You will need the right tools for the job and you need to know to handle those tools. Turn off the chandelier beforehand and make sure the fixture is cool.
Unplug the light fixture before you start replacing the light bulb. You will need a step ladder long enough to reach your best chandelier. But try not to use too long a ladder as you do not want to risk excessive reach. Once up the stairs, be sure to always have one hand on top of it, as it can become unsteady if you lean too close to it; Never rest your full weight against the stairs, instead, always keep three-point contact with the floor and the stairs.
Conclusion
Picking up minimal information on how to change chandelier illumination bulbs in high ceilings on the web is not an easy task. This article will give a detailed description and help you with the best way to change chandelier illumination bulbs on high ceilings.
The easiest way to replace a bulb is to simply remove the globe. If you want to replace multiple bulbs at once, it may be worth buying a long-handled broom handle or something similar. There are also tools to replace electric light bulbs. These can be expensive for what they actually do. To remove the dust cover from the bottom of the chandelier/light fixture, tilt the illumination at an angle and gently press your hand until it pops off. When the cover is closed, there will be a light bulb in the middle. Reach the fixture and remove it from its socket by turning it counterclockwise until it is removed.