

Install LED Ceiling Lights can be a profitable project that complements the lights in your house even as additionally promoting strength efficiency. Whether you are renovating your space or simply replacing outdated furnishings, LED ceiling lights offer a modern and green solution. Their lengthy lifespan, low power intake, and glossy layout lead them to an appealing choice for any room. This manual gives you with all of the data you want to install LED ceiling lighting, from understanding the basics to troubleshooting ability problems. Let’s dive in and remove darkness from your space with self assurance!
1. Understanding the Basics of LED Ceiling Lights
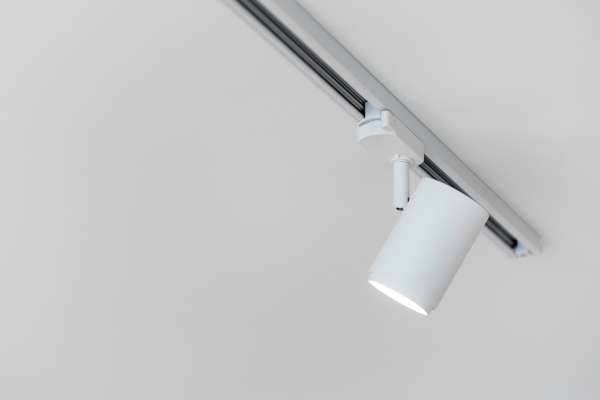
LED (Light Emitting Diode) ceiling lighting are revolutionizing domestic lighting fixtures structures. Unlike conventional incandescent or fluorescent bulbs, LED lighting are electricity-green, long lasting, and provide first rate brightness. They function via passing strength thru a semiconductor, generating light with minimum warmness output, which is why they’re a ways more green than traditional lighting fixtures alternatives. LED ceiling lighting fixtures are available diverse designs, from flush mount to pendant styles, making them suitable for extraordinary room sorts and aesthetics.
One of the key reasons to pick out LED ceiling lights is their wonderful durability. An LED light bulb can last up to 50,000 hours or more, appreciably outlasting incandescent bulbs which commonly last handiest 1,000 hours. Additionally, they eat plenty much less electricity, saving you money on electricity payments over the years.
2. Tools You’ll Need for Installing LED Ceiling Lights

Before embarking at the installation procedure, it’s far crucial to acquire the right equipment. Having the proper device will not best make the set up smoother however also ensure safety at some stage in the process. Here’s a listing of gear you’ll need:
- Screwdrivers: A Phillips head and flathead screwdriver will be required for loosening and tightening screws.
- Wire Cutters/Strippers: These are used to trim and strip the wires to the perfect duration.
- Voltage Tester: To take a look at if the electric circuit is secure to paintings on, making sure no electricity is running thru the wires.
- Drill: A power drill is vital for mounting the fixture securely to the ceiling.
- Ladder: Make positive to apply a robust ladder to reach excessive ceilings, making sure your protection during set up.
- Electrical Tape: For insulating wire connections.
- Safety Glasses and Gloves: Protect your eyes and arms while handling wires and tools.
With those gear at your disposal, you will be well-equipped to put in your new LED ceiling lighting.
3. Step-by-Step Guide: How To Install LED Ceiling Lights

Install LED Ceiling Lights may seem daunting, but by following these simple steps, you can achieve a successful and safe installation:
- Prepare the Ceiling and Gather Supplies: Start by clearing the area under the ceiling where you plan to install the light. Remove any obstructions or furniture that may hinder your movement. Gather all the tools and the LED ceiling light fixture you will be installing.
- Turn Off Power and Ensure Safety: Before starting any electrical work, it’s crucial to turn off the power at the circuit breaker. Use a voltage tester to confirm that the wires are not live. This step ensures your safety throughout the installation process.
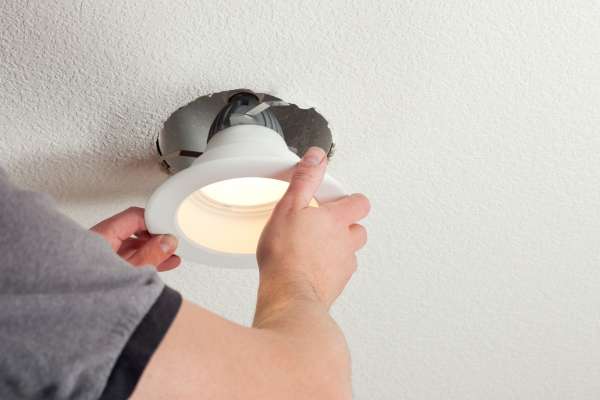
- Mount the LED Ceiling Light Fixture: Position the mounting bracket (usually included with your fixture) onto the ceiling box. Use a power drill to secure the bracket in place, ensuring it is stable and centered.
- Wire the LED Ceiling Light: Connect the wires from your fixture to the corresponding wires in the ceiling box. Typically, the fixture will have a black wire (live), white wire (neutral), and a green or copper wire (ground). Use wire nuts to secure the connections, ensuring they are tightly twisted. Insulate the connections with electrical tape for added security.
- Secure the Fixture: Once the wiring is complete, carefully lift the LED ceiling light fixture and attach it to the mounted bracket. Tighten the screws to secure the fixture firmly to the ceiling.
- Turn on the Power and Test the Light: After double-checking all the connections, turn the power back on at the circuit breaker. Test your newly installed LED ceiling light by switching it on. If everything is wired correctly, you should have a bright, energy-efficient light illuminating your space.
4. Troubleshooting Common Installation Issues
Even with careful preparation, installation of LED ceiling lights may present a few challenges. Here are some common issues and their solutions:
- The Light Doesn’t Turn On: If the light isn’t working, check to ensure that the power is turned back on at the circuit breaker. Verify that all wire connections are secure and properly insulated. A loose connection could be the culprit.
- Flickering Lights: Flickering can be caused by a poor connection, a faulty LED bulb, or issues with the dimmer switch. Ensure that the fixture is properly connected and that the bulb is securely installed.
- The Fixture Is Too Loose: If the fixture wobbles or feels unstable, check the mounting bracket. Tighten any loose screws and ensure the fixture is properly affixed to the ceiling.
By addressing these issues early on, you can resolve problems before they become major headaches.
5. How To Choose the Right LED Ceiling Light for Your Space
Choosing the suitable LED ceiling mild entails more than just selecting a fashion you want. Consider the following factors to make sure the fixture enhances your area:
- Room Size and Light Output: The brightness of LED lighting is measured in lumens. For a larger room, you could want a fixture that offers better lumens for sufficient illumination.
- Design and Style: LED ceiling lighting come in numerous designs, consisting of flush mount, pendant, and recessed patterns. Choose a style that enhances the decor of your room while supplying the right amount of light.
- Color Temperature: LED lighting fixtures are available in numerous shade temperatures, from heat white to cool blue. Choose a shade temperature that suits the temper of the room—heat white for cozy residing spaces or cool white for venture-orientated areas like kitchens.
With the proper choice, your LED ceiling mild will decorate the aesthetic and capability of the room.
6. Saving Energy and Money with LED Ceiling Lights
One of the main advantages of LED ceiling lights is their energy efficiency. LED lights use up to 85% less energy than incandescent bulbs, significantly reducing your electricity bills. Furthermore, they generate less heat, which can lower the need for air conditioning in the summer months. Over time, the savings add up, making LED lights a smart financial investment. With a lifespan of up to 50,000 hours, these lights also reduce the frequency of bulb replacements, saving both time and money.
7. The Best Practices for Maintaining LED Ceiling Lights

Maintaining your LED ceiling lighting fixtures is crucial for ensuring their toughness and superior performance. Here are some exceptional practices:
- Clean Regularly: Dust and dirt can collect at the floor of your LED fixture, dimming its mild output. Use a soft material to wipe down the mild fixture frequently.
- Avoid Overloading: Don’t exceed the endorsed wattage in your LED ceiling light fixture. Overloading can cause overheating and shorten the lifespan of your mild.
- Inspect for Damage: Periodically test for symptoms of wear and tear and tear, inclusive of unfastened fittings or frayed wires. Address any problems directly to avoid in addition harm.
Proper renovation can keep your LED ceiling lights functioning smoothly for years to come.
8. Upgrading Your Lighting with LED Ceiling Lights: Enhancing Your Home’s Atmosphere
LED ceiling lights are an incredible manner to upgrade the lighting in any room. Their electricity performance and aesthetic versatility make them best for enhancing the general atmosphere of your property. Whether you’re looking for ambient lighting on your living room or vivid venture lighting fixtures on your kitchen, LED ceiling lights offer customizable alternatives that cater to every need. You also can combine them with dimmers or smart home generation to control the ambiance based at the time of day or your mood.
9. When to Call a Professional for LED Ceiling Light Installation
While installing LED ceiling lights can be a DIY project, there are times when it’s best to call a professional. If you encounter electrical issues or if the ceiling box needs modification to accommodate a new fixture, it’s advisable to hire a licensed electrician. Additionally, if you’re not comfortable working with electrical wiring or if the installation seems complex, a professional can ensure that everything is installed safely and correctly.
Conclusion
Install LED Ceiling Lights is an awesome way to enhance your property’s lighting fixtures, keep strength, and reduce lengthy-time period charges. By expertise the basics, collecting the necessary tools, and following a clean step-by way of-step guide, you can efficaciously deploy your new furnishings with ease. Whether you select to address the installation your self or are seeking expert help, LED ceiling lighting are a clever investment with the intention to transform your area. With their efficiency, longevity, and aesthetic appeal, these lighting will hold to polish brightly for years to come.