
I once spent an hour staring at a ceiling light that wouldn’t budge. The trim looked simple, but it clung tightly. Turns out, the trick was knowing how to remove recessed lighting spring clips. These hidden clips keep the trim snug and secure. They’re small but strong, and easy to handle with the right steps. I’ve replaced dozens of can lights over the years, and each taught me something new. In this guide, I’ll show you exactly how to remove a can light trim without damage or stress.
Safety First: Turn Off the Power
Before touching anything on the ceiling, make sure the power is off. Go to your breaker box and flip the switch for the room you’re working in. It might seem like a small thing, but skipping this step can lead to serious shock or damage. The safest way to start any light fixture job is by turning off power at the breaker.
To double-check, use a non-contact voltage tester. These small tools are easy to find and cost less than a takeout lunch. Just hold it near the wires or socket—it’ll beep or light up if power is still flowing. A voltage tester tells you right away whether the light is safe to touch.
I learned this lesson the hard way during my first kitchen update. I thought the switch was enough. It wasn’t. Since then, I’ve never worked without testing first. Always test before you touch—it’s quick, cheap, and keeps your fingers safe.
Step-by-Step: How to Remove Recessed Lighting Spring Clips
Taking down a recessed light trim looks tricky. It’s easier than it seems once you know what to do. Follow these steps and you’ll get it done fast, with no damage. Here’s how to remove recessed lighting spring clips in five easy steps.
01. Remove the bulb
Let the bulb cool down. Twist it gently and set it aside. Some bulbs stick—use painter’s tape to get a better grip. Taking out the bulb gives you space to reach the trim.
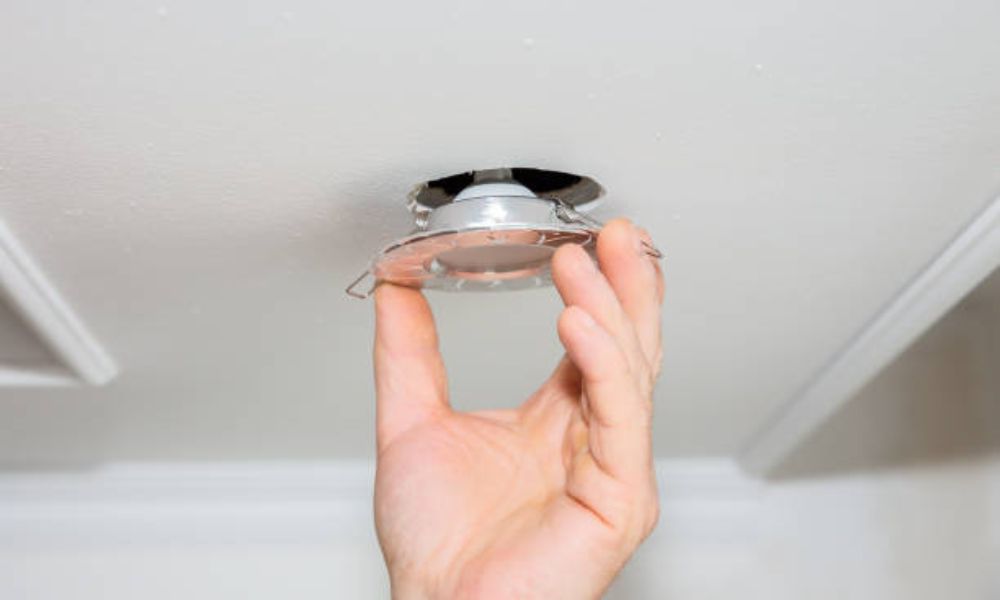
02. Pull down the trim
Slide your fingers under the edge and tug with care. The trim should come loose a little. Stop once you see the springs holding it in place. You need to lower the trim to access the spring clips.
03. Find the spring clips
Look inside the housing. You’ll see two or three clips shaped like metal arms. These hold the trim tight to the ceiling. Spring clips lock the trim into the light housing.
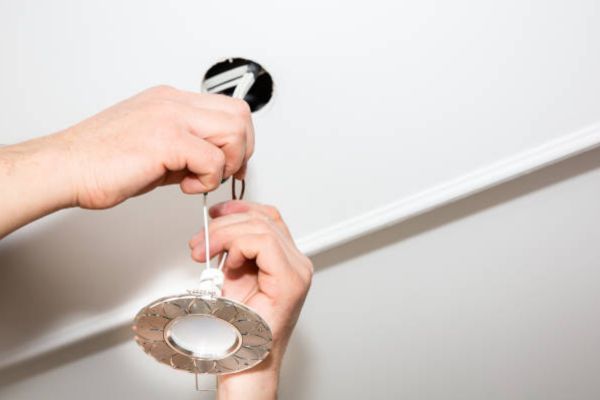
04. Squeeze the clips
Use needle-nose pliers or fingers. Pinch the clip arms and ease them out of the slot. One hand holds the trim, the other pinches the spring. Pinching the spring clips releases the trim from the can light.
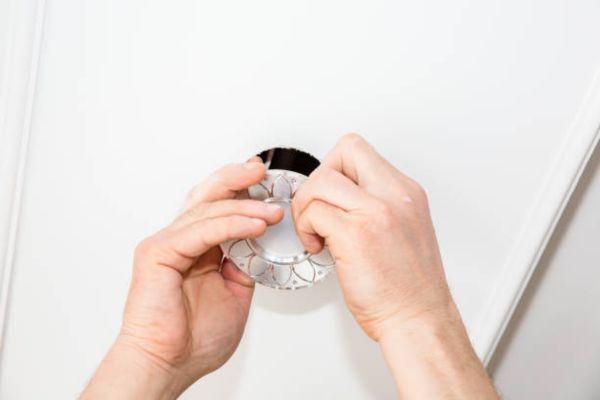
05. Remove the trim
Now the trim should slide out. Take your time—don’t yank or twist. If it sticks, try a soft turn side to side. Once the clips are free, the trim comes out easily.
Practical Tips for a Smooth Experience
A few simple tricks can make this job feel much easier. These steps don’t take much time but save you from stress and small mistakes. These practical tips help your recessed light project go faster and smoother. For optimal results, especially in moisture-prone areas, consider exploring the Best Recessed Lighting for Bathroom — it can make a big difference in both style and function.
Wear gloves
Some trims have sharp edges. Gloves keep your hands safe from scrapes and dust. They also give you better grip. Gloves protect your hands and help you work with more control.
Use a flashlight or headlamp
Light inside the housing can be hard to see. A headlamp keeps both hands free. It helps you spot the spring clips without squinting. Good lighting helps you see what you’re doing.
Keep small parts in a dish
Spring clips and screws like to vanish. A small bowl or cup keeps them safe and easy to find later. Use a dish so nothing rolls away or gets lost.
Ask for help
Working overhead can be tiring. A friend can hand you tools or hold the trim steady. That little support goes a long way. An extra set of hands makes everything easier.
Understanding Different Types of Spring Clips
Not all recessed lights use the same kind of spring. There are a few clip types that hold trims in place. Each works in its own way, and knowing the difference helps. Understanding spring clip types makes removal and replacement easier.
Coil springs look like tiny metal slinkies. One end hooks to the trim, the other to the housing. They stretch and hold tight. These are often used in deeper fixtures. Coil springs are strong and best for tight, secure fits.
Torsion springs look like wishbones. The ends slot into brackets inside the light can. They press outward to hold the trim in place. These are common in newer homes. Torsion springs are easy to remove and great for simple upgrades.
Wing clips are built into the trim. You push them in, and they pop into place. They’re fast to install and don’t need tools. Wing clips offer quick, tool-free trim removal.
Here’s a quick guide for reference:
| Spring Type | Shape | Best For |
| Coil Springs | Spiral or looped | Snug fits in deep cans |
| Torsion Springs | V- or U-shaped | Modern, easy replacements |
| Wing Clips | Flat wings or tabs | Fast, no-tool installs |
Choosing the right trim means matching it to your clip type. Take a quick photo before removing yours—it saves guesswork later.
How to Remove a Can Light Fixture (If Going Deeper)
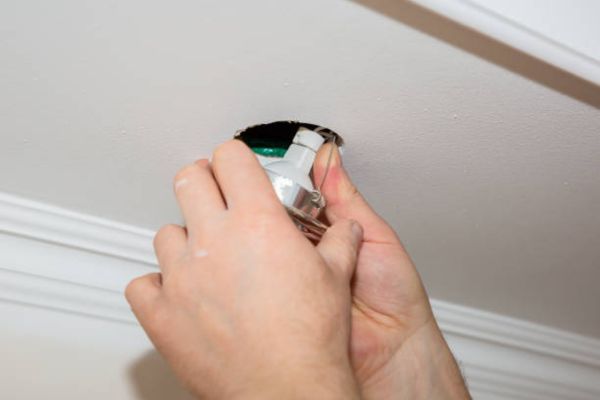
Sometimes, taking off the trim shows a bigger problem—like a loose can, old wiring, or a fixture that won’t hold new trims. In these cases, it makes sense to take out the whole thing. Here’s how to remove a can light fixture safely and cleanly.
Confirm power is off
Always double-check. Use a voltage tester again. This keeps you safe while handling wires. No power means safe hands and peace of mind.
Remove the trim and bulb
These should be out already. If not, go back and follow the steps above. You need full access to the inside of the can. Open space makes removal easier.
Look inside the housing
Most cans have clips or screws holding them to the ceiling. Use a screwdriver or pliers to loosen them. Some may slide or pop out with pressure. Free the housing by loosening its fasteners.
Disconnect the wires
Take note of which wire goes where. Label them with tape. Use wire nuts to cap them after removal. Safe wire handling protects both you and your home.
Pull the can out
Once it’s loose, tilt and slide it through the ceiling opening. Be gentle around the drywall to avoid cracks. Pulling the can straight out finishes the removal.
Common Mistakes to Avoid

Even a simple job like removing a can light can go sideways fast. A little care goes a long way. Here are the most common mistakes to avoid when removing recessed lights.
Pulling too hard
It’s tempting to tug when the trim won’t budge. But too much force can crack the drywall or bend the housing. Always loosen gently and feel for resistance. A slow, steady hand prevents ceiling damage.
Skipping wire labels
It’s easy to forget which wire goes where. That causes problems during reinstallation. Use painter’s tape and a pen to mark each wire before disconnecting. Labeling wires makes reassembly safe and simple.
Using the wrong parts
Not all trims or clips fit every light. Swapping them without checking can lead to poor fits or loose connections. Bring your old parts to the store or take a photo. Matching parts ensures a clean, secure install.
Conclusion
The first try can feel tough. But it gets easier fast. After one light, the next feels simple. Removing recessed lighting spring clips just takes a little care.
Now that you’ve done it, keep going. Try a new trim or upgrade to brighter, better fixtures. Small changes can lift a whole room.
FAQ
Can I remove recessed lighting myself?
Yes. Most trims and spring clips are made for quick removal. As long as the power is off, it’s a safe and easy job. Just go slow and stay steady.
What tools do I need to remove a can light?
You only need a few things. A ladder, gloves, and a flashlight help. Pliers and a non-contact tester make it safer and smoother. That’s all most jobs need.
Is it safe to remove a recessed light on my own?
Yes, as long as the power is off. Use a voltage tester to check. Take your time and handle wires with care.
What helps if a spring clip won’t come loose?
Try moving the trim side to side. Use pliers to grip the clip and squeeze tight. A small shift or extra pressure often does the trick.