
I once tried to light up our bedroom with soft LED strips. Everything looked perfect—until I cut the strip too short. I didn’t have extra connectors, and it felt like the project hit a wall. But I found a way. I learned how to reconnect cut LED strips without connectors using simple tools and a little care. In this guide, I’ll show you how to fix the problem just like I did—step by step, with easy words and real tips from experience. Let’s bring that cozy glow back to life, the way it should be.
Can You Reconnect LED Strips Without a Connector?
Yes, you can. It’s simple, clean, and works well.
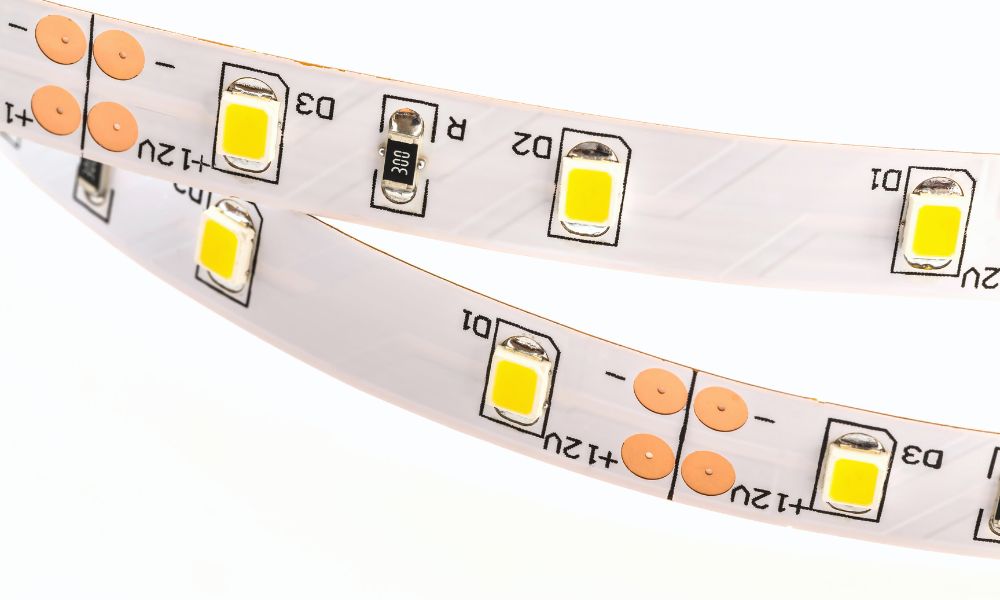
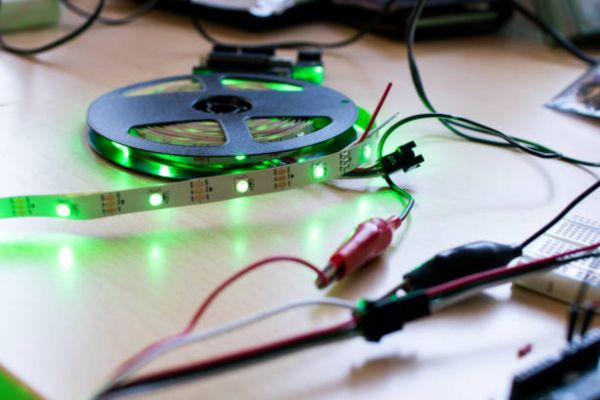
Each LED strip has copper pads at the cut lines. These small pads carry power and signals. That’s where the two pieces connect again.
Many people use plastic connectors. But you don’t need them. You can join the strips by hand. A wire and some tape do the job. A bit of solder works even better.
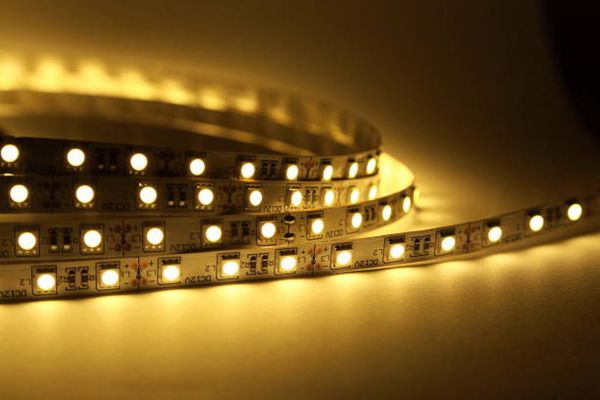
This hands-on method works great for custom lighting. Think of bed frames, wall edges, or soft lights behind shelves. DIY fixes let your space shine just the way you want.
Know Your Strip: Basic LED Strip Anatomy
Think of an LED strip like a tiny road. Power flows through it, turning on little lights along the way. That “road” has break points. These are small spots where you can cut and reconnect the strip.
At each cut point, you’ll see copper pads. They look like tiny metal squares. This is where the magic happens. You connect wires here to bring power back across a break.
Each pad has a label. You might see +12V, G, R, or B. These stand for power, ground, and color lines. Match the same labels on both strip ends. It’s like joining puzzle pieces—each one must go in the right spot.
Tools You’ll Need (No Connectors Required)
You don’t need much to reconnect LED strips. Most of these tools are easy to find at home.
Here’s what I use:
- A small soldering iron (for strong, clean joins)
- Thin wire (22 AWG or close)
- Wire cutters or scissors
- Wire strippers
- Electrical tape or heat shrink tubing
- Tweezers or pliers (optional, but helpful)
- Lighter or heat gun (only for shrink tubing)
No soldering iron? That’s okay.
Here’s a simpler setup:
- Just some wire
- Electrical tape
- A little patience
Either way, the goal is the same—bring power across the gap and make those lights shine again.
Step-by-Step: How to Reconnect Cut LED Strips Without Connectors
Let’s walk through the full process. No guesswork. Just clear steps and simple moves.
Step 1: Clean the Copper Pads
Lay both cut ends flat on a clean table. Use a dry cloth to wipe the copper pads. This removes dust or oil and helps wires stick better.
Step 2: Strip and Prep the Wires
Cut four short wires—about three inches each. Strip both ends of every wire using a wire stripper. You want clean tips with bare metal showing.
Step 3: Match the Wires to the Pads
Look at the labels: +12V, G, R, B. Match the same pads on both ends. Line up each wire to its label. Use red for +12V, black for G (ground), and so on.
Step 4: Solder or Twist Wires Carefully
Soldering method: Touch the wire tip to the copper pad. Hold the soldering iron on it for a second. Let the solder melt and join them together.
No solder? Try this:
Twist each wire to the pad tightly. Hold it in place with tape right away.
Step 5: Test and Insulate
Plug in the LED strip to test the lights. Look for steady, even glow on all parts. Once it works, cover each joint with tape or shrink tube. Wrap the whole bundle gently for safety. Now your strip is back in action—bright, neat, and strong.
No Soldering? Try This Tape-and-Twist Method
No soldering iron? No problem. You can still reconnect your cut LED strips with just wire and tape. This method is simple, safe, and great for beginners.
Here’s how it works:
Twist the stripped end of each wire onto the copper pad. Do it tight. Use your fingers or small pliers to get a snug fit. Then press the wire down and cover it with strong electrical tape.
Once all wires are in place, plug in the strip and test the light. If it glows steady, you’re good to go.
For extra safety, wrap each joint with a second layer of tape. You can also use hot glue to hold wires still before taping. Keep the joint dry and avoid bending it too much.
Pros:
- No soldering tools needed
- Fast and easy
- Great for quick fixes or testing
Cons:
- Not as strong as solder
- It may come loose over time
- Less neat in tight spaces
Common Mistakes to Avoid (Trust Me, I’ve Been There)
I’ve made a few of these myself, so don’t worry—you’re not alone. Let’s make sure your LED strip works right the first time.
Wrong Wire Matchups
This is the most common mistake. Each copper pad has a label like +12V or G. The wires must match pad to pad. Even one mismatch will stop the light or make the colors act strange.
Using Thick Wire
Thicker wire feels strong, but it’s hard to bend and twist. It pulls on the pads and may break the strip. Use thin wire—22 AWG is ideal. It’s flexible, clean, and easier to tape down.
Skipping Testing Before Sealing
Always test the strip before wrapping it up. Power it on, check each section, and make sure the light flows smooth. Fixing a sealed mistake takes more time and effort.
Mixing Up Positive and Ground
+12V and G are not the same. Swapping them can damage the strip or stop the power. Double-check the labels before attaching anything.
Each of these can ruin your hard work. Take it slow, check each step, and you’ll be fine.
My Favourite LED Strip Light Projects in the Bedroom
One of my favourite DIY moments was setting up soft lighting under our bed. It was a quiet weekend. I wanted something gentle—something that made the room feel like a retreat. I cut a strip to size, tucked it under the frame, and ran the wires behind the legs. The glow was soft, warm, and low enough to walk around without turning on the main light.
Another time, I added strips behind the headboard. It gave the bed a floating effect. That little touch changed the mood of the whole room. I later added a strip inside the closet, just around the top edge. Now every time I open the door, a gentle light spills over my shirts.
For all of these, I used dimmable strips with warm white tones. In my opinion, the best LED strip lights for bedroom are the ones that let you adjust the tone and brightness. Look for flexible strips with strong adhesive and clear copper pads. Those are easy to cut and reconnect.
Extra Tips for a Long-Lasting Connection
Want your LED strips to stay bright and strong for years? A few small habits make a big difference.
Label the Wires
Before you start connecting, add tiny labels to your wires. Use tape and a pen. Mark them +12V, G, R, or B. This simple step saves time and avoids mix-ups later.
Always Test Before Sealing
Light it up before you cover the joints. Make sure all sections glow. A short test now can save a full redo later. Just plug it in and take a quick look.
Secure Strips with Clips or Double Tape
Sometimes, adhesive alone doesn’t hold for long. Add clips or use double-sided tape. Press each section down with care. A firm strip stays straight, keeps its shape, and won’t sag or peel.
Final Thoughts
You’ve got this. Reconnecting cut LED strips without connectors might seem tricky at first—but now you know it’s not. With a little care, the right tools, and a steady hand, you can light up your space just the way you want.
There’s something special about doing it yourself. That soft glow you created? It feels different. Warmer. More personal. Every time you flip the switch, you’ll know it was your hands that made it happen.
LED strip lighting is one of the best beginner-friendly projects out there. It’s simple, creative, and full of charm. Start small. Try under the bed, behind your shelf, or around your mirror.