
I stared at the ceiling light. One bulb looked dim, and the trim didn’t match the rest. Something felt off. I had just moved in. Everything else looked fine. The lights didn’t. That was the first time I thought about size. Not the room. Not the bulb. The size of the recessed light. I had no clue how to measure recessed lighting size. But I learned. And that made all the difference. Recessed lights sit inside the ceiling. They make spaces look clean. They also change the feel of a room. Choose the wrong size, and the result looks wrong. The lights feel harsh. Shadows fall in weird spots. I’ve made mistakes. I’ve also fixed them. Over the years, I learned how to get it right. In this article, I’ll show you how. You’ll learn how to measure.
Tools You’ll Need (Before You Climb That Ladder)
Let’s make this simple. You don’t need a toolbox full of fancy gear. Just a few basic things you probably already have at home.
Here’s your quick list:
- Tape measure
- Flashlight or phone light
- Notepad and pen
- A sturdy stool or step ladder
Before I learned the ropes, I climbed up with just a flashlight. I ended up guessing the size—and yes, I guessed wrong. A small measuring tape changed everything. It helped me see the real opening, not the part that’s just for show.
Grab a small notebook too. Write down your numbers. It’s easier than trying to remember if it was 5 or 6 inches once you’re back on the ground.
Climbing up may feel a bit scary. That’s normal. Just make sure your stool is solid and not wobbly. I once used a kitchen chair. Never again. Use something steady. Your knees (and neck) will thank you.
You don’t need to be an electrician. You don’t need special skills. Just go slow, stay safe, and trust the process. Measuring right is the first step to getting lights that look just right.
Step-by-Step: How to Measure Recessed Lighting Size
Measuring a recessed light sounds tricky, but it’s not. You just need to follow a few simple steps. Each one matters, so take your time.
01. Turn Off the Power
Go to your breaker box. Flip off the switch for the room you’re working in. Don’t just use the light switch. You want the power off for safety.
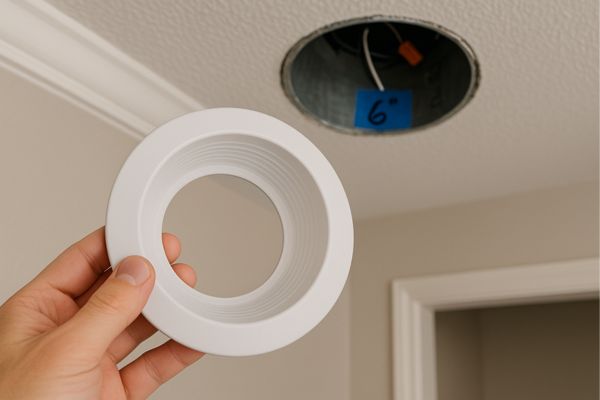
02. Remove the Trim
Look up at the light. The trim is the ring that touches your ceiling. Gently pull it down. It might be held by springs or clips. Go slow to avoid bending it.
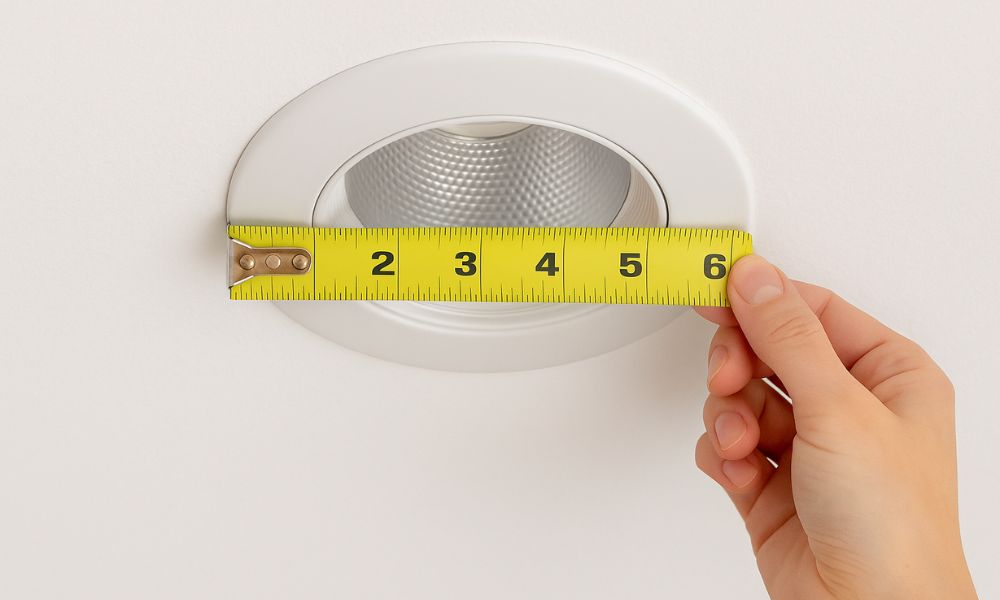
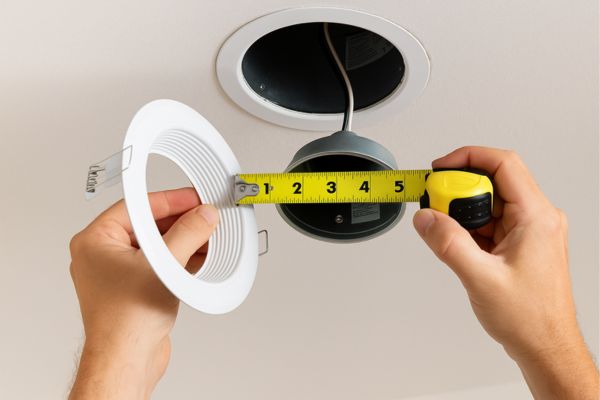
03. Measure the Diameter of the Opening
Take your tape measure. Stretch it across the open can—the hole in your ceiling. Don’t measure the trim. You want the inner edge of the housing.
04. Check the Label Inside
Sometimes the housing has a label. It shows the size, type, or model. You might need a flashlight to spot it. This helps you confirm the measurement.
Common Recessed Lighting Sizes (And Where They Work Best)
Not all recessed lights are the same. Size changes everything—from how a room feels to how the light spreads. For moisture-prone spaces, the best recessed lighting for bathroom options in 4-inch or 6-inch sizes offer both style and function.
4-Inch Recessed Lights
These are small but sharp. They give off focused light and look clean.
- Pros: Great for task lighting, modern look, less glare
- Cons: Covers less space, needs more units for full lighting
- Best for: Hallways, closets, small kitchens, or accent areas
I use 4-inch lights in my hallway. They light the path without casting deep shadows. It feels soft and modern.
5-Inch Recessed Lights
This is your middle-ground size. It gives a balance of spread and control.
- Pros: Wider light than 4-inch, still subtle
- Cons: Not as focused, may look too small in large rooms
- Best for: Bathrooms, kitchens, or mid-size rooms
I installed 5-inch lights in my guest bathroom. It feels bright but not harsh, even with just a few fixtures.
6-Inch Recessed Lights
This is the most common size. It’s bold and fills space well.
- Pros: Broad light coverage, easy to find trims and bulbs
- Cons: May look bulky in tight spaces
- Best for: Living rooms, bedrooms, or high ceilings
I use 6-inch lights in my living room. They light every corner, and I only needed four to cover the whole space.
Kitchen Recessed Lighting Placement: What Works Best?
The kitchen is where light matters most. You chop, cook, clean, and sometimes even eat there. Bad lighting makes it hard to see. Great lighting makes it shine.
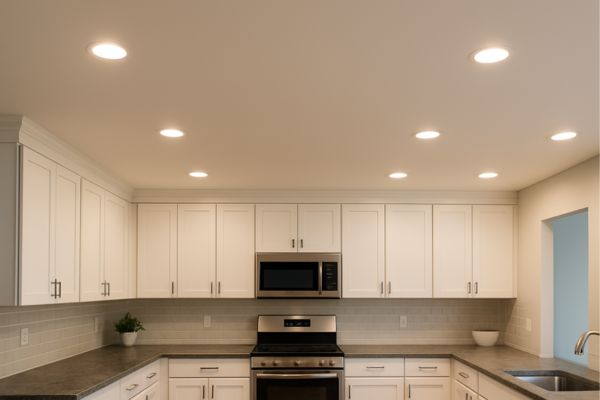
Use 6-Inch Lights for General Lighting
A 6-inch recessed light covers more space. It gives a wide beam that works well in bigger rooms like kitchens. In my kitchen, I used 6-inch cans to keep the whole room bright without needing too many fixtures.
Keep Lights 24–36 Inches Apart
This is the sweet spot. Too close and it feels harsh. Too far and you get dark spots. Start spacing from the edge of the ceiling. Measure about two feet from one light to the next. That creates an even glow.
For best kitchen lighting, place each recessed light 24 to 36 inches apart in a clean grid.
Light the Work Zones, Not the Top of Your Head
Place the lights over what you use: countertops, islands, stoves, and sinks. Avoid placing them right above where you stand—it casts shadows on your hands. I made that mistake once. The light looked fine on paper, but while chopping vegetables, my hands were in the dark.
Pro Tips for Getting the Perfect Fit
There’s something you learn only after making a few mistakes. I’ve been there—buying trims that don’t fit, guessing sizes, or trying to mix parts from different brands. Over time, I’ve picked up a few simple habits that make every lighting job smoother.
Bring the trim with you.
This is the easiest way to get a match. Sizes may look the same online or in stores, but the small details matter. The curve, the clips, the depth—each brand has its twist. Taking the trim ensures you get a perfect fit.
Stick with one brand—unless it says
Different brands often don’t play well together. A trim from one company might not fit the housing from another. Unless the package clearly says “universal fit,” match the brand with what’s in your ceiling.
Mark the size once you know it.
After measuring the light, write the size on a piece of painter’s tape and stick it inside the housing. It saves time later. No more climbing up again to check. Trust me, your future self will thank you.
Each of these steps may seem small, but they save time, money, and frustration. These are the things I wish I knew before my first project. They turn a guessing game into a quick, confident job.
Final Thoughts
Measuring recessed lighting isn’t hard. You just need the right tools, a steady stool, and a bit of patience. Start by turning off the power. Remove the trim. Measure the opening inside the ceiling, not the trim. Then check for a size label, just to be sure.
Match the size to your space. Pick the right type of recessed lighting for the job. Use 6-inch for wide coverage. Go smaller for tight spots or accent areas. Keep kitchen lights spaced right and focused on where you work, not where you stand.
Write down your size, stick with one brand, and bring your trim along if you shop in person. These small steps make all the difference.