
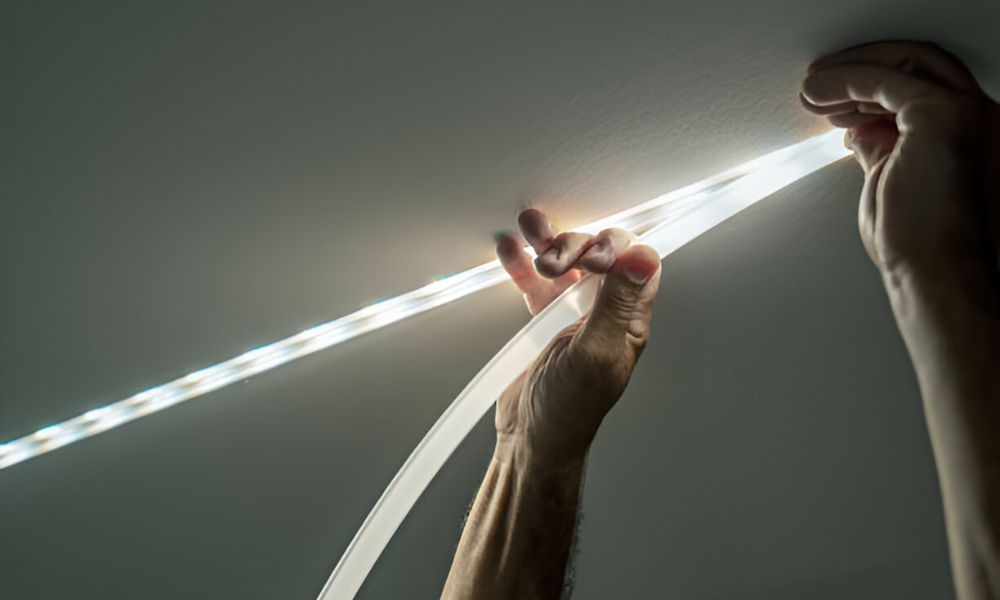
I wanted a soft glow in my bedroom. LED light strips seemed perfect. I stuck them above my bed and turned them on. The light looked great—at first. By morning, one end had fallen. A few days later, more of it peeled off. I tried tape. I tried pushing it back. Nothing worked. Like many beginners, I thought sticking them was easy. But there’s more to it. In this guide, I’ll show you how to keep LED light strips from falling off the right way. Simple steps. Expert tips. All tested. No tools needed—just clean hands and a little care.
Why LED Light Strips Fall Off (Common Mistakes to Avoid)
LED light strips don’t fall off for no reason. There’s always a cause. I’ve made every mistake in the book, so let’s break down what really goes wrong.
Many walls have a thin layer of dust or oil. You don’t see it, but it’s there. This stops the strip from sticking. A quick wipe with water doesn’t fix it. You need to clean the spot the right way.
The tape on most strips is weak. It might hold for a day or two. Then it starts to peel. That’s why knowing how to stick LED lights on wall matters.
Corners and bumps are tricky. Strips can’t grip uneven spots. Over time, they lift and hang loose. It looks messy.
Heat makes it worse. Bedrooms near windows or vents feel warm. Some rooms are humid. That softens the glue. It loses grip fast.
Step-by-Step: How to Keep LED Light Strips from Falling Off
Making your light strips stay in place isn’t hard. But it takes a few careful steps. Each one makes a real difference.
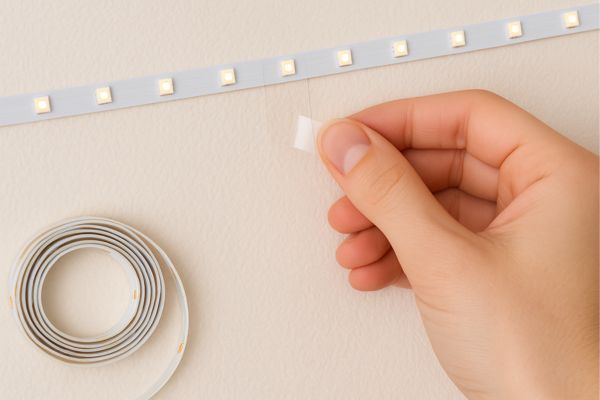
01. Clean the Surface First
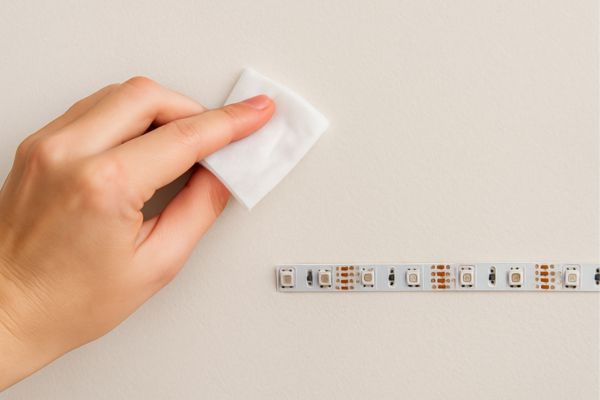
Grab an alcohol wipe or use rubbing alcohol on a clean cloth. Wipe the area where you’ll stick the lights. This removes dust, oil, and grease. Don’t use soap or water—it leaves a film. Let the wall dry fully before moving on. A dry, smooth surface is key.
02. Use Stronger Mounting Tape
The tape that comes with LED strips is weak. It won’t hold for long. Use strong double-sided tape like 3M VHB or Gorilla tape. They stick better and last longer. Cut small pieces and place them on the back of the strip. Avoid one long piece—it can lift at the ends. Press each piece firmly onto the wall. Hold for a few seconds.
03. Add Mounting Clips for Support
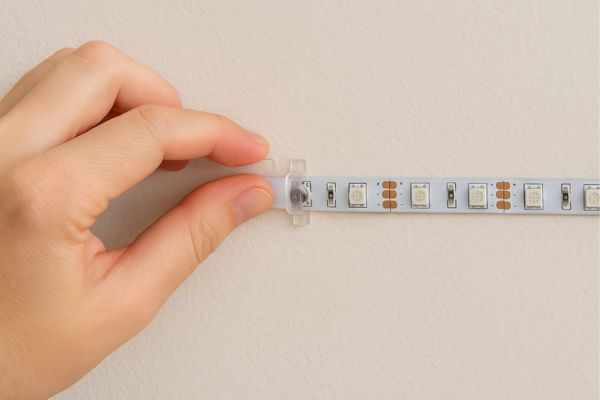
Clips give extra hold, especially for corners or long runs. They stop the strip from drooping or peeling later. You can find small plastic clips online or at hardware stores. Place one clip every two feet. Add extra near bends or edges. Screw or stick the clips in before adding the strip.
04. Don’t Stretch or Tug the Strip
Lay the strip gently where you want it. Don’t pull it tight. A stretched strip will snap back later and fall. Let it follow the shape of your wall. Be patient and go slow. Smooth it down as you go.
05. Warm It Up for Better Stick
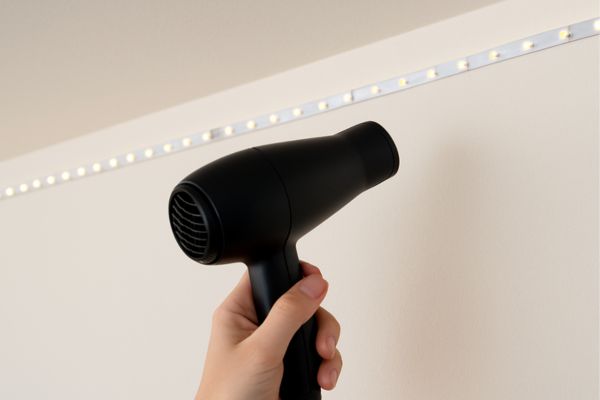
Cold tape doesn’t work as well. Use a hairdryer to warm the strip and wall for a few seconds. Not hot—just warm to the touch. This helps the tape grab better. Keep the dryer a few inches away. A quick pass is enough.
06. Let It Set Before Use
Once the strip is in place, leave it alone. Wait at least 4–6 hours before turning it on. Let the glue cure. Don’t press or adjust it during this time. This small wait helps the strip stay up for good..
Where and How to Stick LED Lights on Wall (That Actually Last)
Not all walls are the same. Some grab better. Some let go.
Smooth surfaces are best. Think painted wood, metal, or finished plastic. These let tape grip tight and stay put. Flat paint works well too. Just make sure it’s clean.
Textured walls are harder. Bumps and grooves break the seal. Over time, strips start to peel. You can still use them, but add clips or run them along smooth trim.
Want to know how to stick LED lights on wall without the mess? Choose the right spot. Try the back of a TV, under a shelf, or above your headboard. These spots stay cool, clean, and dry.
Extra Tips That Make a Big Difference
Some small tricks go a long way. These helped me avoid the same problems over and over.
Use clear tape as backup. A tiny strip of transparent tape can hold loose corners in place. It blends in and adds extra grip where needed.
Avoid spots with steam or moisture. Bathrooms or areas near humidifiers make glue weak. Even good tape won’t stick well in damp air.
Don’t reuse old tape. Once a strip falls, remove the sticky backing. Clean the area and add fresh tape. Re-sticking rarely works.
Store extra strips the right way. Roll them gently. Keep them in a cool, dry place. This keeps the adhesive fresh for next time.
Best LED Strip Lights for Bedroom: My Top Picks
Not all LED strips are the same. Some fall off fast. Others glow for years without trouble. The difference? Better tape, stronger build, and stable power. Choosing the right one saves time and avoids the peeling mess.
Here are my top picks for the best LED strip lights for bedroom use. These are great for beginners and tested by real users (including me).
Troubleshooting Table: What Went Wrong and How to Fix It
Even with care, things can go wrong. Here’s a quick guide to help you spot the issue and fix it fast.
| Problem | Likely Cause | Quick Fix |
| Falls off after one day | Dirty wall or weak tape | Clean surface + use stronger adhesive |
| Won’t stick to texture | Wall is too rough | Add clips or move to smooth surface |
| Peels in heat | Installed near vent | Shift spot or support with a clip |
| Lifts at corners | Too much bending | Use clips around curves and edges |
| Keeps falling in same spot | Old tape reused | Remove and apply new adhesive |
A few small changes can save hours of frustration. Don’t give up—each fix brings you closer to that perfect glow.
Final Thoughts
Getting your lights to stay up may seem tricky at first. But once you follow the steps, it gets easy. A little care at the start saves a lot of trouble later.
Take your time. Prep the surface. Use the right tape. Add clips where needed. These small moves work wonders.
Now you know exactly how to keep LED light strips from falling off. You’ve got the tools, the tips, and the plan.
Frequently Asked Questions
Do LED strips damage walls?
Not usually. Most come with gentle adhesive that won’t peel paint. But on weak or old paint, they can lift flakes. Test a small area first. Or use clips and strong tape for better control.
Can I reuse them after they fall off?
Yes, but with care. Remove the old tape and clean the surface again. Use fresh adhesive or mounting tape. Don’t press the old sticky side back up—it won’t hold for long.
What tools do I need for perfect setup?
You don’t need much. Just alcohol wipes, strong tape, and maybe a few mounting clips. A hairdryer helps too. That’s all it takes to keep your lights up and glowing strong.