
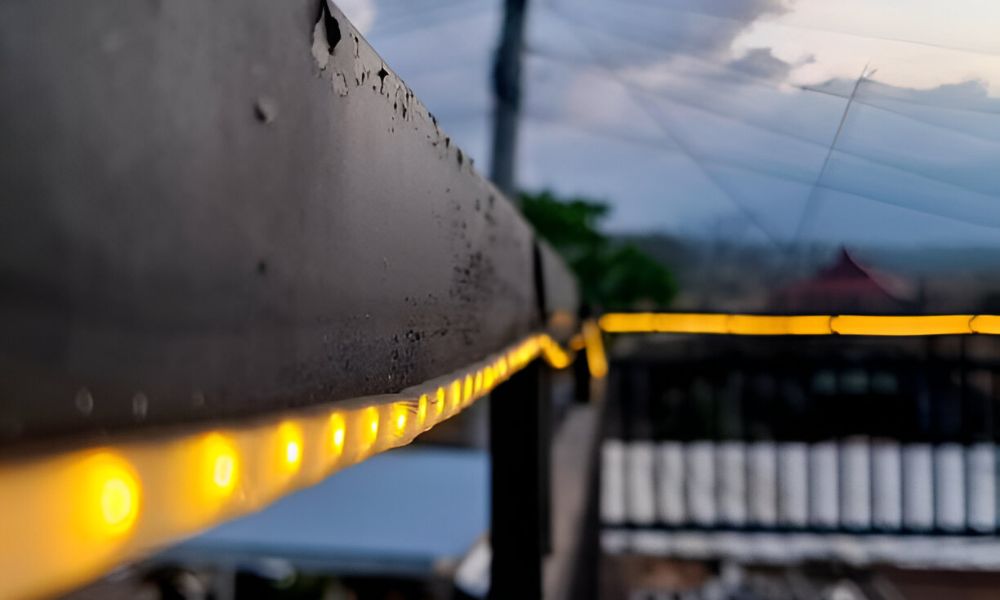
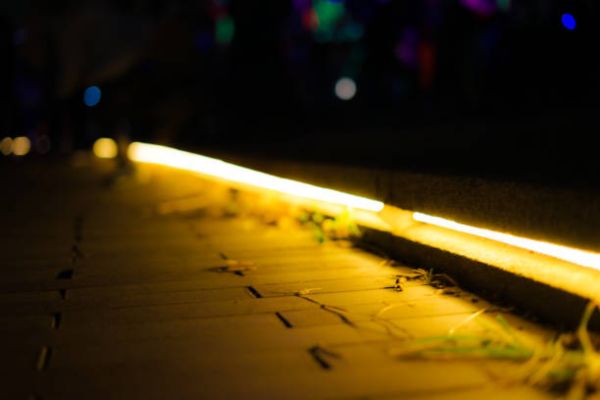
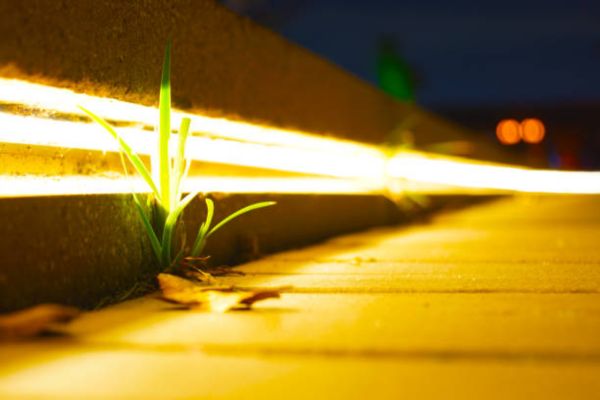
I remember the night I first switched on my outdoor LED strip lights. The yard that once looked plain suddenly came alive with a warm, gentle glow. It turned my patio into a place where family could gather, talk, and relax long after the sun set. Lighting has the power to change mood and even add a sense of safety. Many friends later asked me how to install outdoor LED strip lights for their own homes. That’s why I created this simple guide—to help you get the same results with ease and confidence.
Tools and Supplies You’ll Need
Getting the right tools makes the job smooth. Start with a set of outdoor-rated LED strips. Look for ones marked IP65 or higher, since these are built to handle moisture and dust.
You will also need a power supply matched to the strip voltage, usually 12V or 24V. Add clips or double-sided outdoor tape for mounting. Keep a tape measure handy for accurate lengths.
Scissors or a cutting tool will help trim strips at marked points. Use silicone sealant to protect open ends from water. Cable ties or small conduits make the wires neat and safe.
Indoor lights can feel less demanding, like the best LED strip lights for bedroom use. Outdoor spaces ask more from the setup, so strength and safety matter here. By being prepared, you cut stress and set the stage for a clean install.
Step-by-Step Guide: How to Install Outdoor LED Strip Lights
Plan the Layout
Walk through your space with a tape measure. Mark spots where the strips should run—along railings, steps, or walls. A clear plan keeps the install neat and stops you from cutting too short. Try to keep runs within the length limits set by the strip maker.
Prepare the Surface
Clean the surface before placing lights. Dust and dirt weaken adhesive backing, so wipe it down with a dry cloth or rubbing alcohol. For rough spots like brick or stone, use clips instead of tape. A clean base means the strips hold firm through weather changes.
Measure and Cut Strips
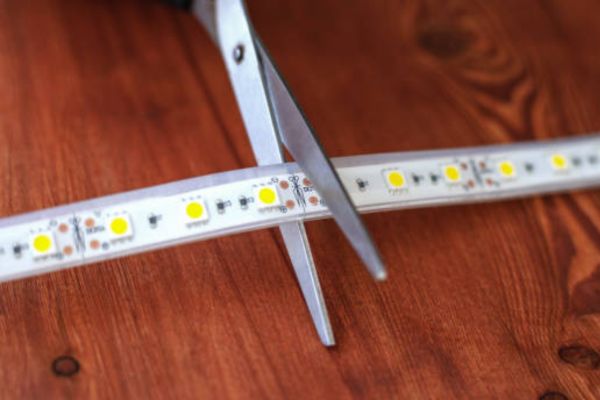
Stretch the strip along your layout before making cuts. Only trim at the marked points on the strip. Cutting in the wrong spot breaks the circuit. Measure twice and cut once for a stress-free setup.
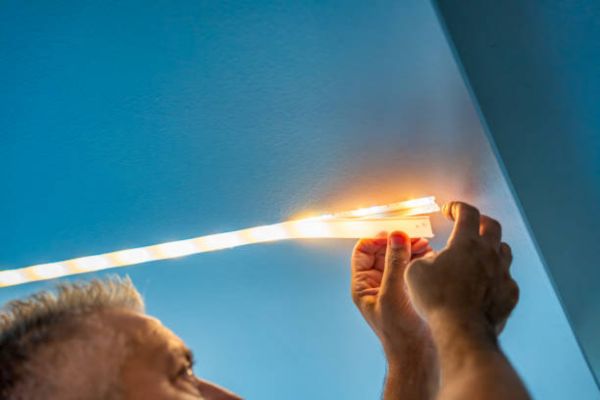
Connect the Power Supply
Match your strip’s voltage—usually 12V or 24V—with the right power supply. Use connectors or soldering tools for secure contact. Seal exposed ends with silicone so water cannot reach the copper contacts. Choose an outdoor-rated power box to protect your supply.
Mount and Secure the Strips
Peel the backing tape and press the strip firmly into place. On uneven surfaces, use clips for extra hold. Neaten cords with ties or slim conduits so nothing hangs loose. A tidy setup always looks more professional and lasts longer.
Test and Enjoy
Plug in the power and check the glow. Lights should run bright and even from one end to the other. Let them run for a few minutes to be sure everything is stable. Once they pass the test, sit back and enjoy the glow you created.
Pro Tips for a Perfect Outdoor Installation
Go Waterproof
Only use waterproof LED strips outside. Look for an IP65 rating or higher. Anything less will fail fast in rain or heavy dew. Stronger strips give peace of mind and last for years.
Choose the Right Color
Warm white creates a cozy, soft glow. Cool white feels bright and crisp, perfect for walkways. RGB strips let you add playful color for parties. Pick based on the mood you want, not just brightness.
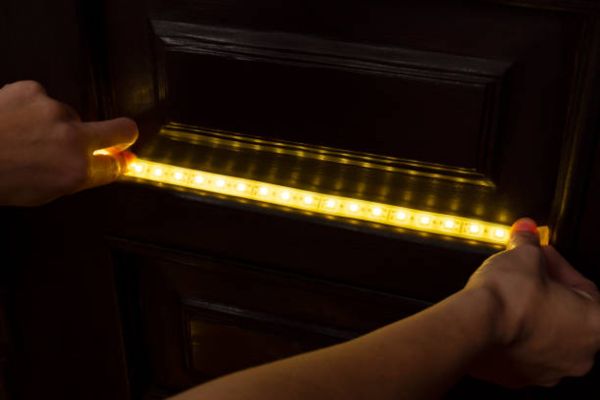
Test Before You Mount
Lay out your strips and connect the power before fixing them in place. This checks for working parts and saves time later. Testing first avoids frustration and ensures every section lights as planned.
Watch the Power Load
Always match the total wattage of your strips to the rating of your power supply. Aim to use only up to 80% of capacity so the supply runs cool. Overloading leads to flicker or early failure.
Seal the Cut Ends
Any exposed copper pads are open doors for moisture. Seal them with silicone or use waterproof end caps. This stops rust, shorts, and dim spots from creeping in over time.
Add Smart Control
A smart controller makes lights even more fun. Use your phone, a remote, or set timers to create routines. I keep mine scheduled to switch on at dusk and off at midnight—zero effort once set.
Choosing the Right LED Lights for Your Space
Picking LED strips is simple once you know what to look for. Outdoor strips must be labeled for outside use. Go for waterproof ratings like IP65 or higher. Strong strips handle rain, dust, and changes in weather. Outdoor LED lights shine brighter to light up open space and last through every season.
Indoor options are different. The best LED strip lights for bedroom setups focus on adding color, softness, and mood. They flex behind shelves or beds and let you choose fun hues with RGB features. Bedroom strips create atmosphere but won’t stand up to water or sunlight.
Are outdoor LED lights the same as the best LED strip lights for bedroom use? Not really. Outdoor strips are tough, built to resist damage, and made to last outside. Bedroom strips highlight style with easy bends and changing colors.
Look for products marked safe for both indoor and outdoor settings. These give you many choices for home projects. A little planning makes each space shine and helps every install look neat and work smoothly.
Common Mistakes Beginners Make
Many first-timers skip getting waterproof LED strips. This is risky since rain and moisture quickly ruin lights not made for the outdoors.
Leaving cut ends open invites water and dirt. Always seal these spots with silicone to keep the strip working longer.
Some people pull the adhesive tape too tight. This weakens the bond and causes lights to peel off over time.
Choosing the wrong power supply and going over the wattage limit makes strips flicker or burn out early. It pays to check all ratings before starting.
Messy wires look bad and may get damaged. Use cable ties and tuck wires away to keep everything safe and neat.
How to Keep Your Outdoor LED Strip Lights in Good Shape
Wipe down LED strips with a dry cloth each season to clear dust or dirt. For sticky messes, use mild soap and water, never strong chemicals. Keeping the surface clean helps the lights shine as bright as new.
Check seals and adhesive at every joint. Look for loose clips or peeling tape. Add a dab of silicone where tape lifts or water might sneak in. Well-sealed strips hold up through all kinds of weather.
For long strips, use a volt meter to check that power reaches both ends. If you spot dim spots, split the line or add power at the far side. Balanced power means even lighting across the yard.
During off seasons, store your strips where they stay dry and safe. Coil them loosely and cover with a towel. This protects the wiring and keeps them ready for your next outdoor project.
Final Thoughts
Putting up outdoor LED strip lights is easier than it looks. With a little planning, each step feels simple and quick. The results can change any yard for the better.
I love how these lights make my evenings rich and inviting. Soft glow along the patio makes every meal and family chat feel special. The yard now feels safer and more welcoming after sunset.