
LED strip lights are a simple way to transform any space. They add soft, beautiful light to your kitchen or bedroom. Whether you need better lighting for cooking or a cozy vibe for your bedroom, these lights are the perfect solution. The best part? How to install LED strip lights under cabinetsis easier than you might think. This guide will help beginners, step by step. We’ll cover everything, from installation tips to picking the best LED strip lights for your bedroom. By the end, you’ll have your cabinets glowing and your space looking fantastic.
Why LED Strip Lights Are a Great Addition to Your Home
They are a popular choice for home decor. They add a modern, stylish look to any room. These lights are flexible and can fit anywhere, from kitchens to bedrooms.
They are also energy-efficient. LED strips use less power and last longer than traditional lights. This makes them cost-effective and low-maintenance. Once installed, they need little care.
It can change the feel of a space. In a bedroom, they create a relaxing atmosphere. In a kitchen, they improve lighting for cooking. Choosing the best LED strip lights for your bedroom can help set the perfect mood.
Tools and Materials You’ll Need
- LED Lights: Choose the right type for your space. Pick based on size and brightness.
- Power Adapter: This connects your strips to a power source.
- Tape Measure: Measure the area where you’ll place the lights.
- Scissors: Cut the strips to fit your space.
- Adhesive Strips: Use these to stick the lights in place.
- Cleaning Materials: Wipe down the surface with a cloth and isopropyl alcohol.
- Mounting Clips (optional): Use these for extra support to hold the strips securely..
Step 1: Measure and Plan the Placement

First, measure the length of your cabinet. This will tell you how much LED strip you need. Place the lights where they won’t be seen directly but still light up the area below. For an even look, ensure the strips are spaced evenly along the cabinet.
Step 2: Prepare the Surface
Clean the surface where you will install the strips. Use a cloth and isopropyl alcohol to remove dust and dirt. A clean surface helps the adhesive stick properly, so the lights stay in place longer.
Step 3: Cutting the LED Strips to Fit
LED strips have marked cut lines. Use scissors to cut the strips at these points. Be careful to cut only at the marked lines. Cutting in the wrong spot can damage the lights and cause them to malfunction.
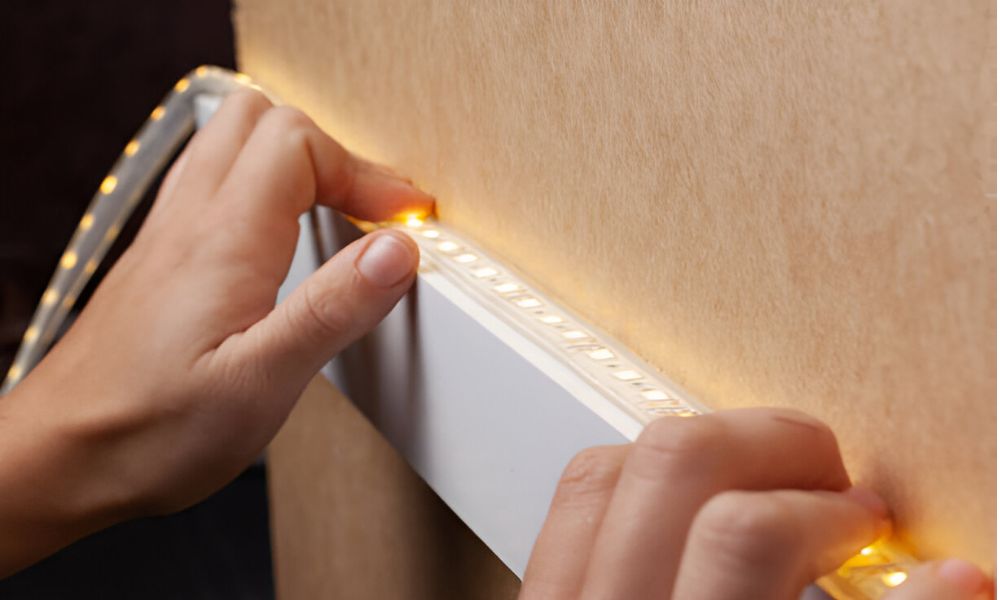
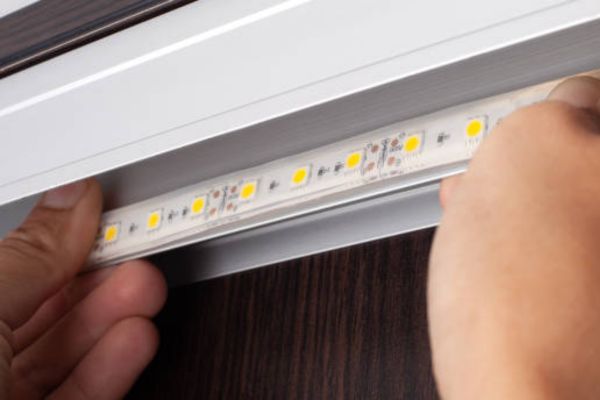
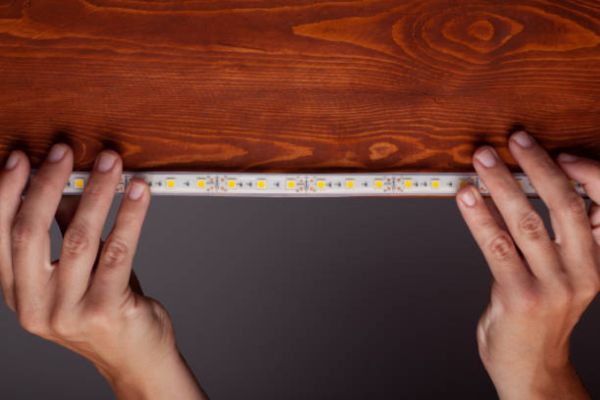
Step 4: Install the Strips
Peel off the adhesive backing and stick the strip to the underside of the cabinet. Press down firmly to make sure it stays. If needed, use mounting clips to keep the strip secure and prevent it from peeling off.
Step 5: Connect to the Power Supply
Connect the LED strips to the power adapter. Plug the adapter into an electrical socket. To keep the look clean, tuck away the wires or use clips to hide them.
Step 6: Test and Adjust the Lights
Before finishing, plug the lights in to check they work. Adjust the brightness or color to match your space. Once satisfied, secure the lights and wires in place..
Additional Tips for Getting the Best Results
Choosing the Right Color Temperature
The color temperature of your LED strips affects the room’s feel. For a cozy bedroom, go for warm white (2700K). It creates a calm and relaxing atmosphere. For kitchens or workspaces, cool white (5000K) is best. It provides bright, focused light, perfect for tasks.
Consider Dimmable Options
Dimmable LED strips offer great flexibility. You can adjust the brightness based on your needs. Soft light for a relaxing evening or bright light for reading. This control makes them perfect for any room.
Use Smart Features
Smart LED strips let you control your lights with apps or voice assistants. Change the color, brightness, and even set schedules. This added convenience makes smart LED strips a great option for modern homes.
Common Mistakes to Avoid
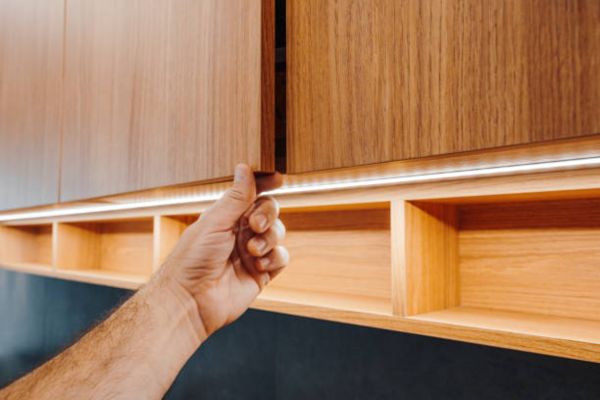
One common mistake is not hiding the lights properly. If the strips are visible, they can look messy. Make sure to install them under cabinets or along edges to keep them hidden but still effective.
Another mistake is cutting the LED strips at the wrong points. Always cut at the marked lines to avoid damaging the strips. Cutting them incorrectly can affect their performance.
Not cleaning the surface thoroughly is another error. Dust or grease can stop the adhesive from sticking. Clean the area well with a cloth and isopropyl alcohol before installing the strips.
Troubleshooting Tips
If the lights aren’t working, check the connections. Make sure the power adapter is plugged in properly and the strips are connected correctly. If the strips peel off easily, press down firmly or use additional mounting clips for extra support. You may also need to clean the surface again if the adhesive is not sticking.
Conclusion
Installing LED strip lights under cabinets is a simple way to upgrade your home. It’s an easy project that can add both style and functionality. With the right tools and a little effort, you can transform any room in no time.
This DIY project is perfect for beginners. You don’t need expert skills, just a few simple steps to follow.