
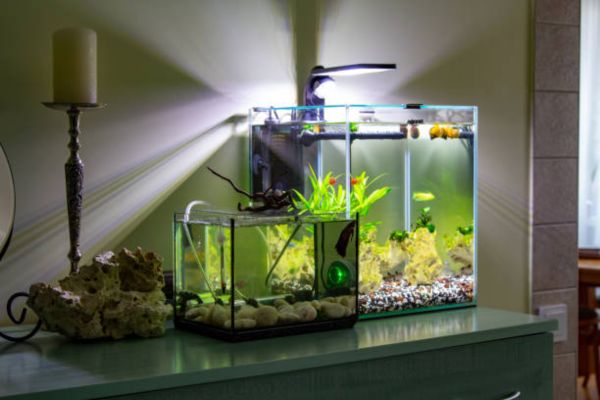
Getting your planted tank lighting right can feel confusing at first, especially when you’re staring at cables, mounts, and a brand-new aquarium LED hanging light. I remember setting up my first tank and wondering how to hang Fluval planted light without messing up my plants or burning out the LEDs.
Once I learned the right height and used the Fluval planted light hanging kit properly, my planted tank lighting setup finally looked clean, bright, and professional. In this guide, I’ll show you the exact steps I use for safe, simple Fluval aquarium light mounting with a reliable aquarium light suspension system.
Why Proper Hanging Height Matters for Planted Tanks
Proper lighting height plays a huge role in how healthy a planted tank looks and grows. When a light hangs too close to the water, plants can get stressed and algae can take over. When it sits too high, plants may stretch and lose color. The right height keeps the tank balanced, clean, and easy to maintain.
Good light height makes an aquarium feel alive. Plants grow strong and full. Colors look richer. The water stays clearer. It creates a calm, natural look that every planted tank needs.
How Light Height Affects Plant Growth
Light height controls how much power reaches the plants. This power is called PAR. Too much PAR can burn leaves. Too little PAR makes plants grow thin and pale.
A well-set height helps plants grow steady and strong. New leaves grow thicker. Stems stay firm. Growth looks natural instead of stretched.
Proper height also slows algae growth. Strong light placed too close feeds algae fast. A balanced height keeps algae under control.
Common Problems From Incorrect Mounting
When a light hangs too low, plants become stressed. Growth slows down. Leaves turn yellow and weak.
Too much light also invites algae. Green film forms on glass. Hair algae grows on leaves. Cleaning becomes a constant task.
Uneven hanging creates shadows. Some plants grow tall. Others stay small. The tank looks messy and unbalanced. Fixing the hanging height brings everything back into balance. Less algae. Better growth. Stronger color. A planted tank always looks better with the right light position.
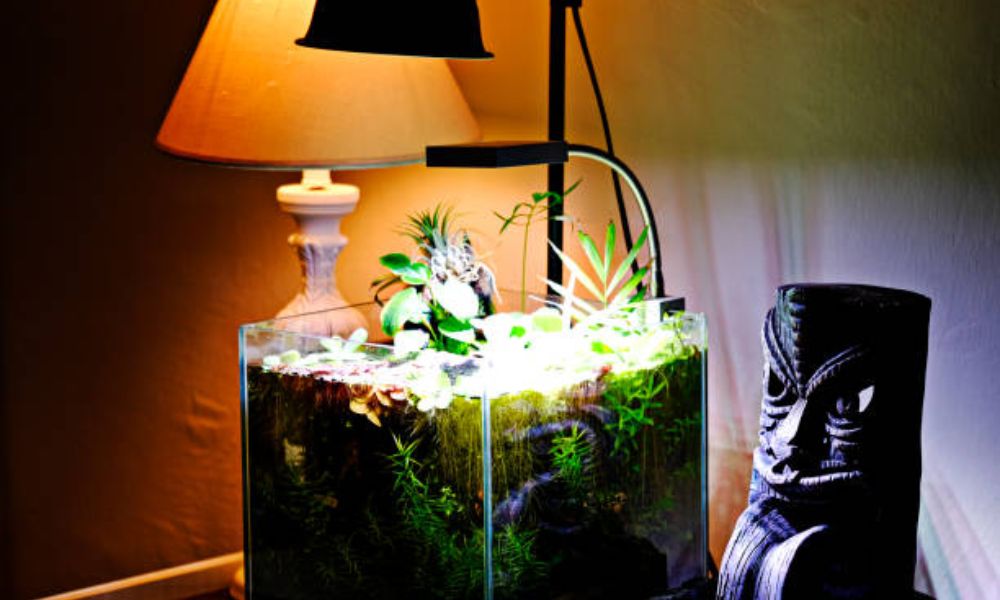
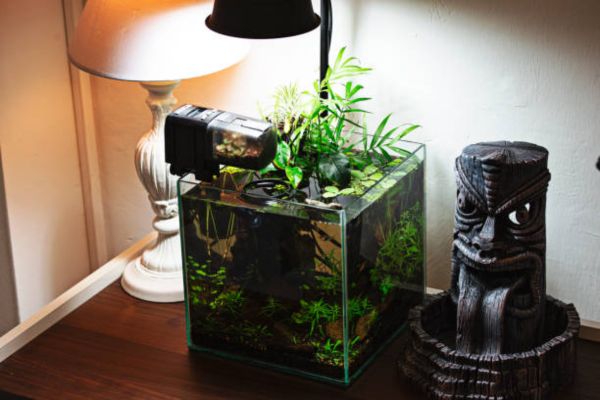
What Comes With the Fluval Planted Light Hanging Kit
The Fluval planted light hanging kit makes mounting clean and simple. It turns a regular light into a safe aquarium light suspension system that looks neat and professional. Once installed, the light stays stable and easy to adjust.
What’s Inside the Box
The kit includes strong suspension cables that safely hold the light above the tank. They are thin but very durable. Ceiling mounts lock into place and keep the light steady. They prevent movement and shaking. Adjustment hardware allows smooth height changes for easy tuning.
Tools You’ll Need
- A drill is needed to make mounting holes.
- A measuring tape helps center the light over the tank.
- Anchors support the weight and keep the system secure.
How to Hang Fluval Planted Light Step-by-Step
Installing a Fluval aquarium light mounting system is simple when done step by step. The process takes about 20 to 30 minutes and does not require advanced tools. Once finished, the tank looks clean and professionally lit.
Safety always comes first. The ceiling must support the full weight of the light. Strong anchors must be used to prevent accidents.
Step 1 — Measure Your Tank and Ceiling Height
Start by measuring the length of the tank and finding the center point. This helps position the light directly above the middle of the aquarium.
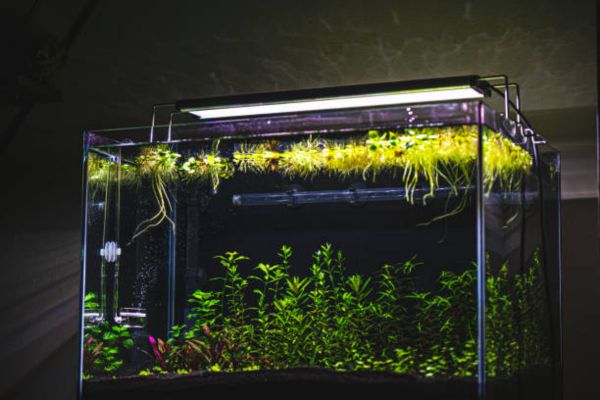
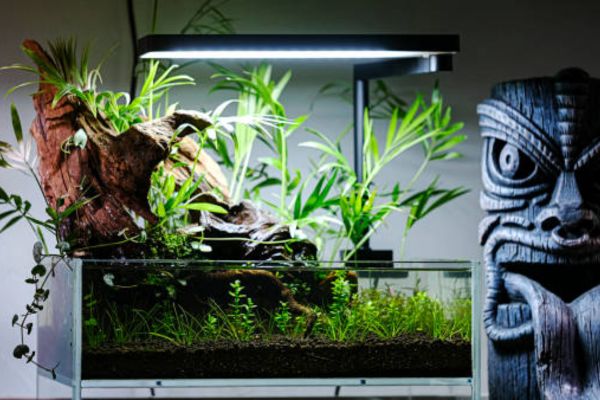
Measure the ceiling height and decide how far above the water the light should hang. Most planted tanks do best with the light 8 to 12 inches above the water surface.
Step 2 — Install Ceiling Anchors
Mark the drill points based on the cable spacing. Drill the holes slowly and cleanly.
Insert the anchors fully into the ceiling. They should sit flush and feel tight when pressed.
These anchors carry the full load of the aquarium light suspension system, so they must be secure.
Step 3 — Attach Suspension Cables
Thread the suspension cables through the ceiling mounts. Lock them in place according to the kit instructions.
Attach the lower ends of the cables to the Fluval light frame. Make sure both sides are even.
The light should hang straight and level.
Step 4 — Adjust Light Height
Slide the adjustment hardware to raise or lower the light. Start higher and slowly bring it down.
This prevents plant shock and helps avoid algae blooms.
Step 5 — Test and Fine-Tune Lighting
Turn on the light and check coverage across the tank. ERntire tank should be evenly lit.
Watch the plants over the next few days. If growth looks weak, lower the light slightly. If algae increases, raise it a bit.
During the first setup, the light was hung too low, which caused fast algae growth. Raising it by just three inches fixed the problem and brought the tank back into balance.
DIY Ways to Hang Fluval Aquarium Light Without Kit
A Fluval aquarium light mounting system can be built at home using simple hardware. Many aquarists use budget methods to create a safe and clean aquarium LED hanging light setup.
Budget Hanging Options
Shelf brackets can hold a light above the tank using a wall-mounted frame. Wall mounts can support a horizontal bar for cable hanging. Light racks sit behind the tank and suspend the light from above.These options work well for custom setups and save money. If you are also growing indoor plants, check out our full guide on Best Grow Lights for Meyer Lemon Tree for healthy growth and strong fruit production.
Pros and Cons of DIY Mounting
DIY mounting is affordable and flexible. Height can be adjusted easily. The look can be customized.
However, stability depends on build quality. Poor materials may bend or loosen over time. Weight support must be planned carefully.
Hanging vs Mounting — Which Is Better?
| Feature | Hanging | Mounting |
| Stability | Very stable with anchors | Stable on solid tank rims |
| Light coverage | Wide and even | Focused and narrow |
| Adjustability | Easy height control | Limited adjustment |
| Aesthetics | Clean and modern | Simple and compact |
Hanging works best for large planted tanks and aquascapes. Mounting is better for small tanks and tight spaces.
Common Mistakes to Avoid When Hanging Aquarium Lights
Hanging the light too low can cause algae and plant stress. Using weak anchors can lead to accidents and falling lights. Uneven suspension creates shadow spots in the tank. Ignoring plant light needs leads to slow growth and poor color.Correct height and strong support keep the tank safe and healthy.
My Personal Setup Experience (E-E-A-T Section)
The first setup placed the light too close to the water. Algae grew fast and plants looked weak. Light was raised by a few inches and secured with stronger anchors. Suspension was leveled for even spread. Within weeks, plants grew thicker and brighter. Algae dropped sharply. The main lesson was simple. Light height matters more than brightness. A balanced setup always gives better results.
Conclusion
Lighting is the foundation of plant health. The right height gives strong growth, rich color, and clean water.
A proper setup saves money and prevents constant algae problems. Small adjustments can fix most lighting issues. A well-lit tank isn’t just beautiful — it’s alive.
FAQs
How do I hang a Fluval planted light from the ceiling?
Use a hanging kit with ceiling anchors and suspension cables. Center the light over the tank and adjust the height.
What height should a Fluval planted light be above the tank?
Keep the light about 8 to 12 inches above the water for best plant growth.
Is hanging an aquarium LED light safe?
Yes, it is safe when strong anchors and proper mounting hardware are used.