
My bedroom used to feel dull. No warmth. No charm. One evening, I added a soft strip of light behind my headboard—and everything changed. That glow made the space feel calm and cozy. I had no idea how to connect LED light to power supply at first. But once I figured it out, it was easier than I thought. Now, I help others light up their spaces too. The best LED strip lights for bedroom can make your room feel brand new. In this guide, I’ll show you how to do it step by step—no stress, just simple, clear help.
What You’ll Need Before You Begin
Before starting, gather a few basic tools. You won’t need anything fancy. Just what gets the job done right.
Here’s what I keep in my own setup:
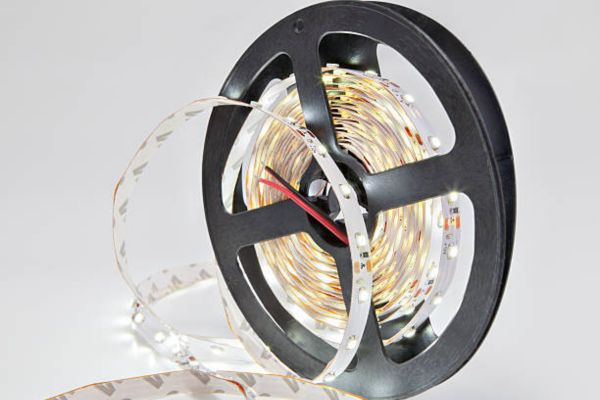
- LED light strip
- Power supply (with matching voltage)
- Wire stripper or scissors
- Connector clips or soldering wires
- Electrical tape or heat shrink tubing
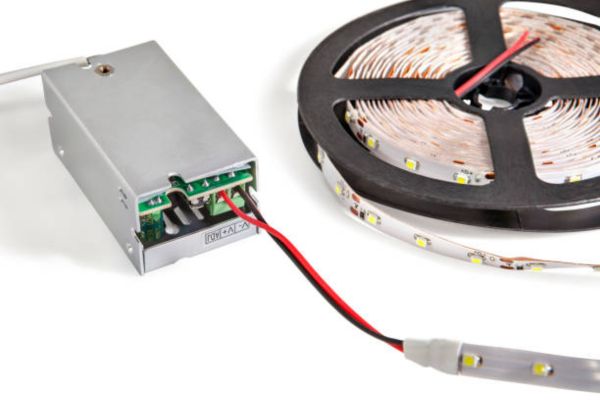
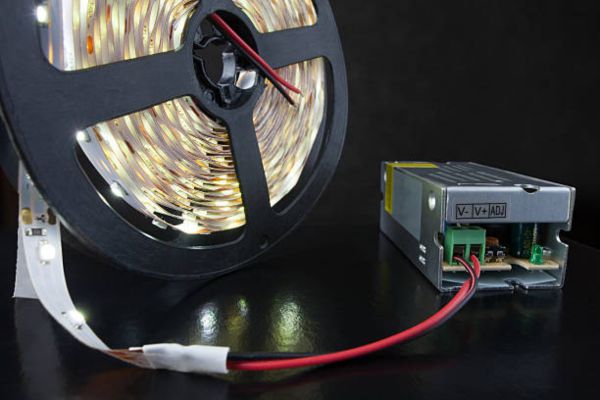
The power supply must match the light’s voltage and current. Most strips are 12V or 24V. Always check the label before plugging in. I use a 12V 3A adapter for my bedroom lights. It runs cool and works great.
Also check the amps. Choose a power supply with more current than the strip needs. I go 20% higher—it keeps things safe and stable.
Understanding Your LED Light Strip
Before plugging in, it helps to know what you’re working with. LED strip lights may look simple, but there are key things to check first.
Most strips run on 12V or 24V power. You must match this with your adapter. Using the wrong one can damage the lights. Always read the label or product sheet.
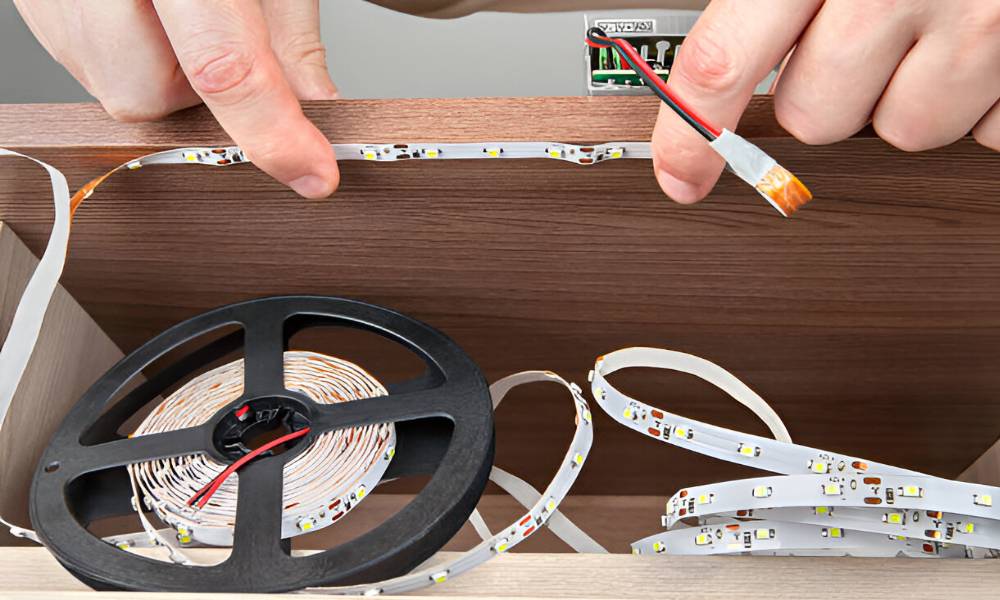
Each strip has a positive and negative side. It’s often marked with small “+” and “–” signs. Get these wrong, and the strip won’t light up. I once flipped mine the wrong way and thought it was broken!
There are also different connector types. Some strips come with pre-attached wires. Others use snap-on clips or need a little soldering. I prefer the ones with clips—they’re fast and clean.
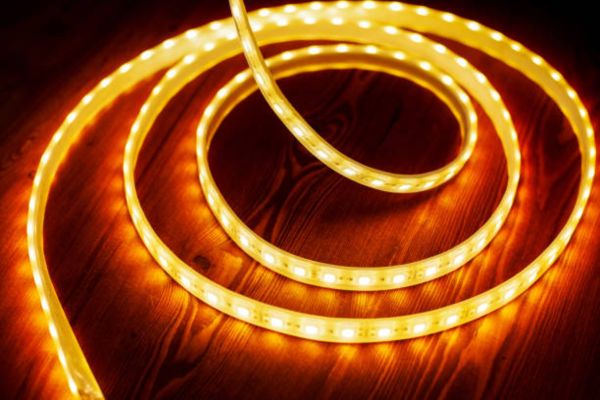
Choosing the best LED strip lights for bedroom means thinking about how you want the space to feel. Warm, soft, and restful is always my go-to.
4. Step-by-Step: How to Connect LED Light to Power Supply
Let’s keep this easy. You’re just five small steps away from a glowing bedroom. Here’s how to connect the simple way:
Find the Positive and Negative Sides
- Look for “+” and “–” signs on the strip
- Red wire is usually positive
- Black or white wire is often negative
- Match them correctly—no light means they may be flipped
Check the Voltage Match
- Read the voltage on the LED strip (12V or 24V)
- Make sure the power adapter gives the same voltage
- More amps is okay—but never use more voltage
- I use a 12V 3A adapter for most home strips
Connect the Wires
- Use clip connectors or solder for a firm hold
- Red goes to red, black to black
- If using clips, snap them in tight
- Check that the metal touches clean wire
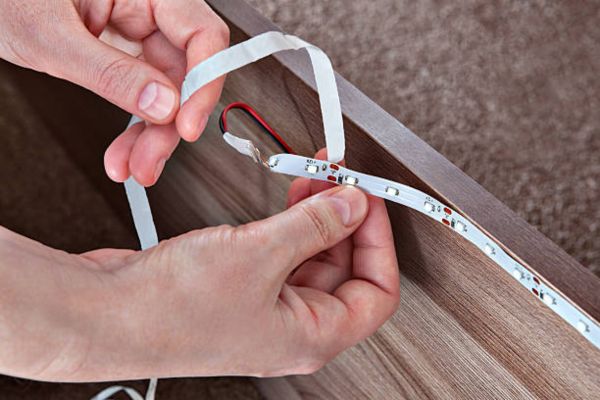
Secure the Connection
- Use heat-shrink tubing or wrap with electrical tape
- This stops the wires from coming loose
- Keeps your setup safe and tidy
Plug In and Test
- Connect the adapter to the wall
- Flip the switch
- Enjoy the glow
- No light? Unplug, then double-check wire direction and connection
Bedroom Setup Ideas Using LED Lights
This is where the fun starts. Once your lights are working, it’s time to get creative.
One of my favorite spots is behind the headboard. The glow spreads softly across the wall. It adds warmth without shining in your eyes. It feels peaceful—like a quiet sunset.
You can also run the strip along the top edge of your ceiling. This makes the room look bigger. It draws your eyes upward and gives a soft frame to the space. Use warm light for a cozy look.
Try under the bed too. It gives a cool floating effect. I used this trick in my guest room. Everyone asks how I did it. All it took was tape and a short LED strip.
Want something smart? Add motion sensors. Mine lights up when I step out of bed at night. No fumbling for a switch. No harsh glare. Just gentle light underfoot.
Remote controls are great too. You can dim the lights or change colors without getting up. It’s a small upgrade, but it makes a big difference.
Common Mistakes to Avoid (From Personal Experience)
I’ve made every mistake in the book. Some were small. Others nearly ruined my setup. Here’s what to watch out for—so you don’t repeat them.
Mismatched Voltage
I once used a 24V adapter for a 12V LED strip. It flashed once, then died. Always check the voltage before plugging in. The numbers must match. No exceptions.
Loose or Weak Wire Connections
A loose wire may work for a minute, then flicker or fail. I’ve seen it happen more than once. Use strong clips or solder the wires. Then test them with a gentle tug.
Overloading the Power Supply
Some people think any adapter will work. It won’t. If your strip pulls more power than the supply gives, it can overheat—or just shut off. I always use a supply with 20% more amps than needed.
Skipping the Test Step
This one hurts. I once stuck an entire strip behind furniture—only to find out it didn’t light up. Always test before installing. It saves time, effort, and your mood.
Expert Tips for a Clean and Safe Installation
Want your LED setup to look pro? These simple tricks can help. I’ve learned them through trial, error, and a few burnt-out strips.
Use Thicker Wire for Long Runs
Long wires lose power. Lights at the far end may look dim. I use 18 AWG wire for anything over six feet. It keeps the glow even from end to end.
Test Brightness Along the Strip
Light can fade if the power drops. After wiring, turn it on. Look from start to finish. If the end looks dull, you may need stronger wire or a second power point.
Hide the Wires Neatly
Loose wires look messy. Worse, they can snag or break. Use adhesive clips or cable covers. I run mine along baseboards or behind furniture for a clean finish.
Add a Dimmer
Not every moment needs full brightness. A simple dimmer lets you set the mood. I use mine every night—it’s one of the best add-ons you can buy.
Final Thoughts
Connecting LED lights isn’t hard. You don’t need special tools. Just a few parts, a little time, and clear steps.
By now, you’ve learned how to match the power supply, wire the strip, and test your setup. You’ve also seen how to place the lights in your bedroom for a cozy glow.
You can do this. Start small. Try a soft light behind your headboard or under your bed. See how it feels.
Remember—it’s simpler than it seems. And once you get it right, you’ll wonder why you waited so long.
FAQs
What power supply do I need for a 12V LED strip?
Use a power supply that gives exactly 12 volts. Look at the strip’s amp rating. Choose a supply that offers more amps than the strip needs. This keeps the lights safe and stable.
Can LED lights plug into a wall outlet?
Yes, with a proper adapter. The adapter turns your wall power into low voltage. Most LED strips need 12V or 24V. Never plug the strip into the wall without a converter.