

I still remember the first time I tried how to connect LED strip lights together—I had lights on one wall and darkness on the other, and it drove me crazy. If you’ve ever wondered how to connect LED strip lights, connect two LED strips together, or even connect LED strip lights without soldering, you’re in the right place. I’ve tested different LED strip light connectors, made mistakes, fixed them, and learned what actually works in real homes. In this guide, I’ll show you how to join LED strip lights the easy way and even explain if you can connect multiple LED strips to one power supply. Let’s make your lighting simple, clean, and stress-free.
Why Learning How to Connect LED Strip Lights Together Matters
Learning how to connect LED strip lights helps avoid dark gaps, messy installs, and wasted money. Many people face this issue when one strip falls short of covering a wall, cabinet, or ceiling edge. I’ve stood there myself, annoyed by a small empty space that ruined the whole look.
Properly extending LED strips creates smooth, even lighting from end to end. No broken sections. No odd shadows. Just one clean line of light that makes a room feel finished.
My first home lighting project taught me this fast. I tried to push two strips together without a connector. Nothing turned on. After using the right LED strip connectors, everything worked instantly. That small success showed why this simple skill matters.
Tools and Materials You’ll Need
Having the right tools makes this job simple and stress-free. You don’t need a full workshop or expensive gear. Just a few basic items handle most LED strip connections with ease.
LED strip lights of the same type matter most. Matching strips connect better and light evenly. LED strip light connectors help join pieces fast and clean. A soldering iron helps but stays optional for beginners.
Extension cables give extra reach. A proper power supply keeps everything stable. Scissors cut at marked points. A soft cloth cleans dust so connections grip well.
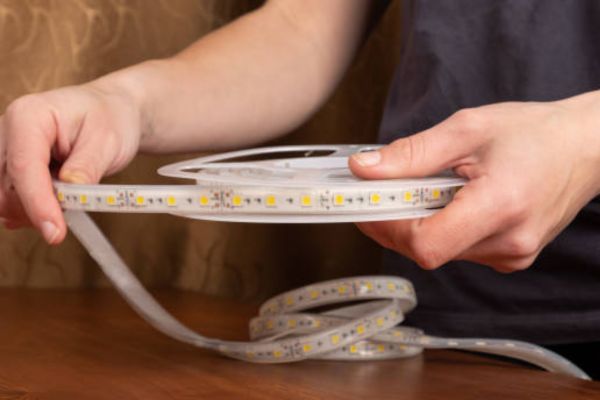
Check Your LED Strip Type Before Connecting
Not all LED strips work the same. Some are single-color. Others are RGB or addressable. Each type uses different connectors and wiring layouts.
Voltage must match. Most home strips run on 12V or 24V. Mixing voltages causes dim lights or dead sections.
Mismatched strips create problems. Lights may flicker. Colors may look wrong. Some parts may not turn on at all. Checking type and voltage first prevents almost every common issue.
How to Connect LED Strip Lights Together Using Connectors
Connecting LED strip lights with connectors is the easiest method for most people. No special skills, heat,stress. Just slide, press, and lock.
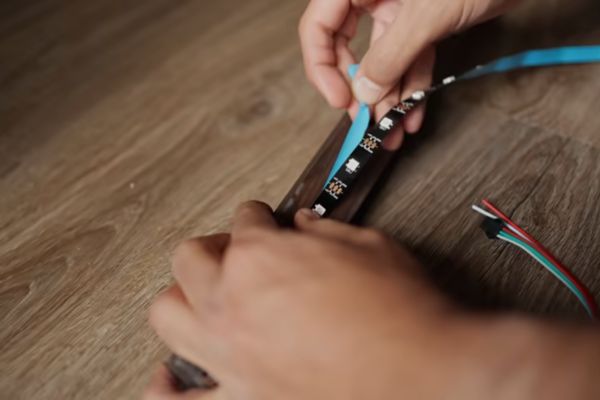
Start by lining up the copper pads on the strip with the metal pins inside the connector. Gently insert the strip straight in. Make sure the copper pads sit fully under the contact points.
Close the connector clamp until it clicks. A firm lock keeps power flowing smoothly. If the clamp feels loose, reopen and reseat the strip.
This is the best beginner method because it is fast, clean, and reusable. Most home installs work perfectly with good-quality LED strip light connectors.
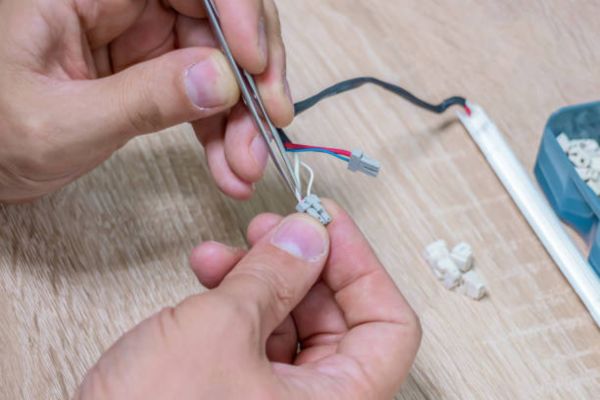
How to Connect LED Strip Lights Without Soldering
Solderless connectors let you join strips without using heat or tools. You simply slide each strip into the connector and snap it shut.
The big advantage is speed. You can finish a setup in minutes. They are also safer for beginners.
The downside is that cheap connectors may loosen over time. I’ve had this happen once. Switching to a better connector fixed the issue instantly. Since then, solderless kits have been my go-to choice for quick installs.
How to Connect Two LED Strips Together With Soldering
Soldering makes sense for permanent installs or tight spaces. It creates a strong electrical bond that rarely fails.
Strip a small section of coating off the copper pads. Tin the pads with solder. Place a short wire between matching pads and heat until the solder flows.
Always unplug power before soldering. Work in a ventilated area. Avoid touching the hot tip. This method takes more skill but gives very reliable results.
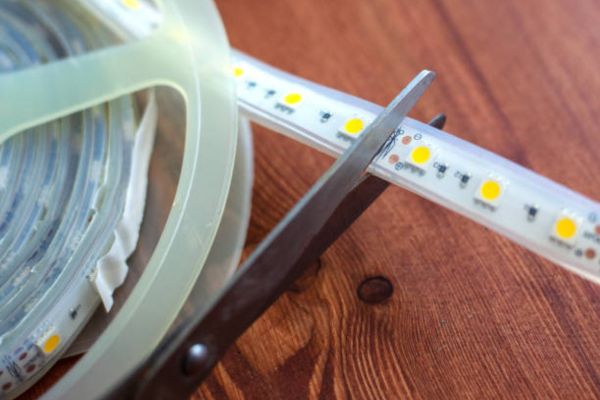
How to Join LED Strip Lights After Cutting
Only cut LED strips at the marked cut lines. Cutting anywhere else breaks the circuit. After cutting, expose the copper pads. Insert the cut end into a connector or solder wires onto the pads.
Common mistakes include cutting in the wrong spot, flipping polarity, or using the wrong connector type. Slow, careful steps prevent all three problems.
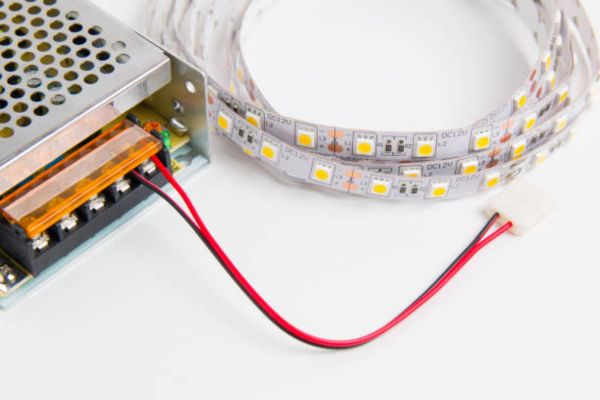
Can You Connect Multiple LED Strips to One Power Supply?
Yes, multiple LED strips can run from one power supply if the total wattage stays within the power supply’s limit. Add up the wattage of each strip, then choose a power supply that can handle at least 20% more than that total.
Parallel connections work best for home setups. Each strip connects directly to the power supply, so all strips receive full voltage. Series connections often cause dimming and uneven brightness.
A weak power supply shows clear signs. Lights flicker. Colors look dull. Strips turn off randomly. These signs usually mean it’s time for a stronger power supply.
Best LED Strip Light Connectors for Easy Installation
2-pin connectors work best with LED strips. They are simple and very common. 4-pin connectors support RGB strips. They handle color channels correctly and keep colors synced.
Corner connectors help turn around tight angles without bending strips. Extension connectors add length between two strip sections.
Using the right connector type makes installs faster and more reliable.
Common Problems When Connecting LED Strip Lights (And Fixes)
Lights not turning on usually means reversed polarity or loose connectors. Flip the strip or reseat the connector.
Flickering often points to a weak power supply or poor contact. Upgrade the power supply or tighten connections.
Only one section working suggests a bad cut point or damaged copper pad. Recut at the marked line and reconnect.
Loose connections happen with cheap connectors. Switching to better-quality connectors fixes this fast.
My Personal Experience Connecting LED Strip Lights at Home
At first, I rushed the job. I mixed strip types and ignored voltage. Nothing worked. After slowing down, I matched voltages, used proper connectors, and checked polarity. Everything lit up smoothly. The biggest lesson was simple. Good prep saves hours of frustration. Small details make big differences.
Safety Tips When Connecting LED Strip Lights
Always turn off the power before touching any wires. This prevents shock and short circuits. Keep copper pads covered after connecting. Exposed metal can cause shorts.
Mount strips on clean, dry surfaces. Secure mounting prevents sagging and loose connections over time. Safe habits protect both you and your lighting system.
Frequently Asked Questions
How do I connect LED strip lights together?
Insert both strips into a matching LED strip connector, align the copper pads, snap it closed, and test the lights before mounting.
Can I connect LED strip lights without soldering?
Yes. Use solderless connectors. Slide the strip into the connector, close the clamp, and the strips will connect securely.
Can I connect multiple LED strips to one power supply?
Yes, as long as the combined wattage of all strips is lower than the power supply’s rating, with about 20% extra capacity for safety.
Final Thoughts
You don’t need advanced skills or expensive tools. You just need the right method and a little patience. Take time to check your strip type, match the voltage, and use proper connectors. Test each connection before mounting. These small steps prevent most problems. With a simple approach, anyone can connect LED strip lights and create clean, even lighting that looks great and works reliably.