
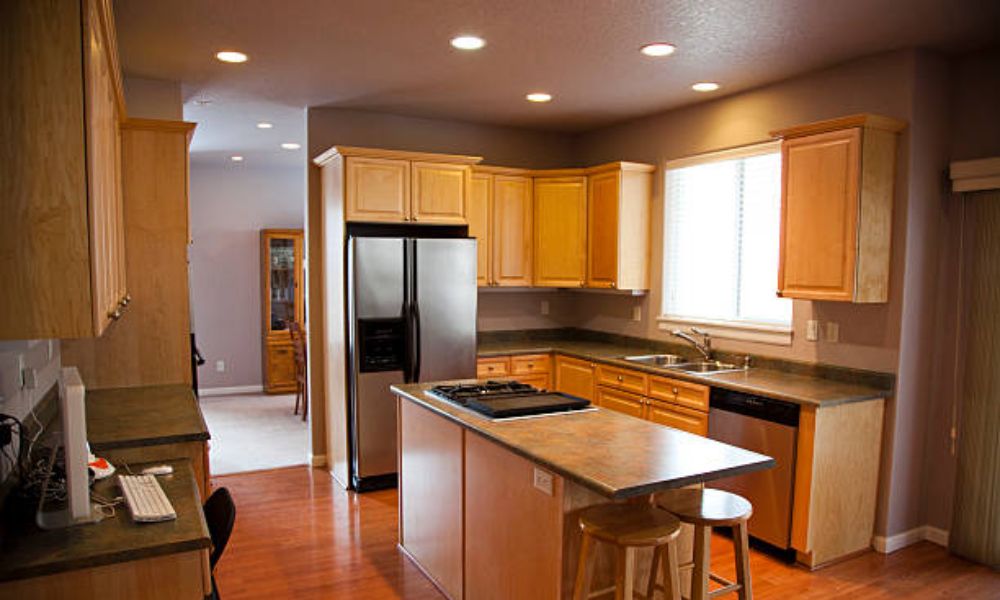
I remember the day I finished my kitchen lights. They looked sharp. I stepped back, turned them on, and half the counter was still dark. The problem wasn’t the light. It was the placement. I hadn’t thought about how far from the cabinets the recessed lights should be. The lights shine too close on the cabinet doors. Lights too far away leave your work area in shadow. The goal is to light the space where your hands move. Over the years, I fixed this in my own home and helped friends fix theirs. It’s not hard, but it takes a plan. You need the right spot, the right spread, and the right count. This guide breaks it down. You’ll learn how to space your lights. You’ll see how recessed light coverage works. Even find out how many recessed lights you need.
Why Recessed Lighting Placement Matters
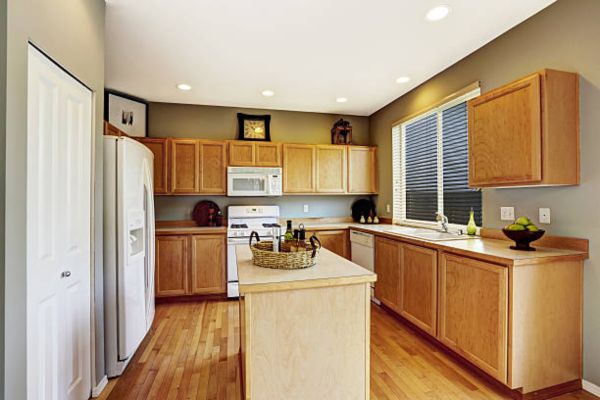
Good kitchen lighting does more than light the room. It shapes how you move, cook, and feel. A soft, even glow makes every task easier. You see your tools, your food, and your space.
In one of my earlier homes, I placed the lights where they “looked good.” But I kept slicing veggies in the dark. I had bright lights—but the wrong spots. That’s when I saw how much placement matters.
Recessed light coverage is how much area each light covers. A wide beam fills more space and makes the room feel calm. A tight beam can leave harsh edges or dark spots. It’s like using a sponge versus a dropper—one spreads, the other hits one spot.
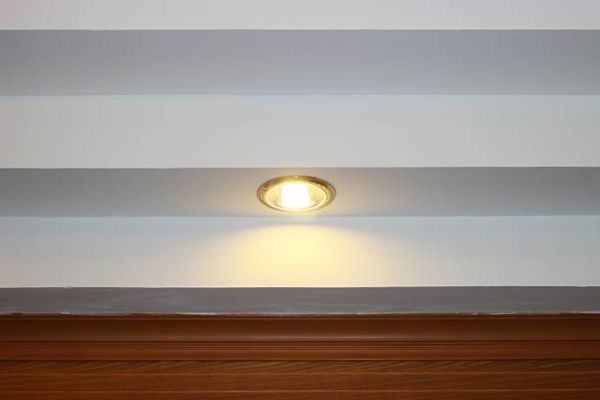
How Far from Cabinets Should Recessed Lights Be?
Recessed lights should be placed 12 to 18 inches from the face of the upper cabinets. This range gives the best light on your counters without harsh glare.
This small detail makes a big change. Place them too close, and the light bounces off the cabinet doors. Too far, and your hands cast shadows. That sweet spot—12 to 18 inches—is where light hits the counter just right.
I found this out while fixing my kitchen. I tried 10 inches first. It looked fine, but I kept leaning. I moved them out to 16 inches, and the difference was huge. The glow was soft, and the shadows were gone—something I also kept in mind when choosing the best recessed lighting for bathroom to create a similar balanced effect.
Step-by-Step Guide to Placing Recessed Lights
Planning your lights is just as key as installing them. A little prep now will save time and fix-ups later. Let’s walk through it—no guesswork, just simple steps.
Tools and Materials
Here’s what you’ll need before you start:
- Tape measure
- Pencil
- Painter’s tape
- Flashlight or laser pointer
- Stud finder or joist finder
- Ladder
- Template for recessed light (often comes with the light kit)
01. Check Ceiling Joists
Grab a stud finder and scan the ceiling above your cabinet run. Joists can get in the way of your plan, so map them early. Mark their edges lightly in pencil
If joists block your ideal spot, you can still work around them. Just shift a few inches and aim it with an adjustable trim later.
02. Mark the Distance
From the face of the upper cabinets, measure out 12 to 18 inches on the ceiling. This is your lighting zone. Use a pencil to place a dot where the center of each light will go. Use painter’s tape to create clean outlines of where each will sit. It helps you see the full layout before cutting.
03. Visual Test with Light
Take a flashlight or laser pointer and shine it from your marked spot down to the counter. This helps you see where shadows will fall and how far the will reach. A light aimed from 12–18 inches out will hit the counter, not your face.
Look from every angle—by the sink, at the stove, from the hallway. Make sure it feels right from every spot in the room. Once everything looks right, you’re ready for the next phase: wiring and cutting. But don’t rush. The plan is what makes the glow feel effortless.
Recessed Lighting Spacing – How to Space Lights Evenly
You’ve marked your distance from the cabinets. Great! Now let’s talk about how to space your lights across the room. Even light spread keeps the kitchen bright, calm, and shadow-free.
Got an 8-foot ceiling? Space about 4 feet apart. This keeps the light smooth and balanced. It also avoids bright spots or dark patches on your counters. Cabinets Should Recessed Lights
How Beam Spread Changes Everything
The beam spread is how wide shines. A narrow beam (like 30°) lights a tight spot. A wide beam (like 90°) spreads across a big area.
The beam angle helps you decide how far apart the lights go. Wider beams can sit farther apart. Tighter beams need to be closer.
Why Recessed Lighting Spacing Matters
Even spacing gives your kitchen a clean, open feel. It keeps corners lit and avoids eye strain. With the right layout, the light flows like water—smooth and soft.
Plan each like it’s part of a grid. Think of it like laying out tiles—keep the gaps equal and the pattern clean.
Bonus: When to Break the Rules
Most kitchens work with the ceiling height rule. But some layouts need a tweak.
Open kitchens with high ceilings may need closer spacing or more lights. Galley kitchens with long, narrow runs might only need one row down the center.
Recessed Light Coverage Explained
Not all recessed lights shine the same way. Some spread widely. Others shine like a spotlight. This spread is called the beam angle, and it’s key to how your kitchen looks and feels.
Wider angles give soft, even light across counters. Narrow-angle angles focus light in a small spot. Think of it like a flashlight versus a lamp—both things up, but one is much sharper. Cabinets Should Recessed Lights
Common Beam Angles and What They Cover
Here’s a simple guide to beam angles and how much space each one lights:
| Beam Angle | Light Spread Area | Best Use |
| 30° | 2–3 feet wide | Task lighting, spotlight zones |
| 60° | 4–6 feet wide | Standard kitchen lighting |
| 90° | 6–8 feet wide | Even coverage near cabinets |
Why Recessed Light Coverage Matters
Lights that are too narrow leave gaps. Lights that are too wide can feel flat. The key is balance—enough spread the counter, but not so much that it floods the whole room.
I like to use wide-beam lights near the prep zones. Then I’ll mix in tighter beams over key areas like the sink or stove. It keeps the space warm, clean, and easy on the eyes.
How Many Recessed Lights Do I Need?
You want your kitchen to be bright, not blinding. Just right—not too dark, not too harsh. So how many recessed lights do you need? There’s a simple way to find out.
Use This Easy Formula:
Room Length × Width × 1.5 = Total Watts Needed
Total Watts ÷ Lumens Per Light = Number of Lights
Most LED recessed give off about 800 lumens (equal to a 60-watt bulb). That makes them great for kitchens.
Example Layouts
Small Kitchen (10×10 ft)
10 × 10 × 1.5 = 150 watts
150 ÷ 800 = 2 lights (use 3 for better spread)
Medium Kitchen (12×14 ft)
12 × 14 × 1.5 = 252 watts
252 ÷ 800 = 3–4 lights
Large Kitchen (16×20 ft)
16 × 20 × 1.5 = 480 watts
480 ÷ 800 = 6–7 lights
Most kitchens need 3 to 7 recessed lights for full.
Use a Lighting Calculator
Don’t want to do the math? Use a free online tool like a recessed calculator tools to plan your layout. Just enter your room size, and it does the rest.
The right number of makes the whole kitchen feel just right—no shadows, no hot spots. And with a simple plan, it’s easy to get it perfect from the start.
Pro Tips for a Perfect Kitchen Lighting Plan
Let’s bring it all together with a few pro tips. These ideas are simple, smart, and make a big difference.
Always Add Dimmers
Dimmers are a must. They let you change the feel of your kitchen with a quick twist. Bright for prep, soft for evening meals. One switch, full control.
Mix Lighting Types
Don’t just rely on one kind of light. Use task lighting over counters and sinks. Add ambient light for a soft, full-room glow. Drop in accent lights to highlight shelves or décor.
I like to combine recessed with under-cabinet strips. It fills the gaps and adds warmth. No dark corners, no overkill. Cabinets Should Recessed Lights
Stick to Spacing and Count
Keep your lights spaced right. Stick to the rule—ceiling height ÷ 2 = spacing. Stay in that 12 to 18-inch range from cabinets. And use your layout math to guide the total count.
My Favourite Layout
Here’s what I use in most kitchens:
- Lights placed 16 inches from cabinet faces
- Spaced 4 feet apart
- Dimmers on every switch
- Wide beams near the counter
- Under-cabinet LEDs for accent
Conclusion
Great lighting starts with small choices. A few inches here or there can change how your whole kitchen feels. The sweet spot—12 to 18 inches from your cabinets—keeps your counters bright and your space balanced.
Smart spacing, like dividing your ceiling height by two, helps spread the light with care. And the right light count means no dark corners, no guesswork—just a room that works with you.
Grab a tape measure. Map it out with tape. Test with a flashlight. See how it looks before you cut. Planning ahead saves time and headaches.
Don’t worry about getting it perfect the first time. You can start small, try it out, and adjust along the way. That’s how real homes are built—step by step, with heart.