

One evening, I walked into my living room and felt a cold draft. The heater was on, but it still felt chilly. Then, I realised the recessed lights were letting heat escape. That’s when I learned how important it is to insulate recessed lights. It can waste energy. Without insulation, warm air slips out, raising your bills. They can also be a fire hazard if not insulated correctly. The good news is, insulating around can lights is simple and safe. In this guide, I’ll show you how to insulate recessed lights. You’ll learn what materials work best and how to do the job safely. Let’s dive in and make your home more energy-efficient.
Why Insulating Recessed Lights is Important
A few months ago, I noticed my heating bills were rising. I realised the recessed lights in my home were letting heat escape. This made the heater work harder. Insulating the lights helped me save money on my bills.
After insulating, my home felt warmer. The temperature stayed consistent in every room. Insulation eliminates cold spots and makes your home more comfortable.
01. Turn Off the Power
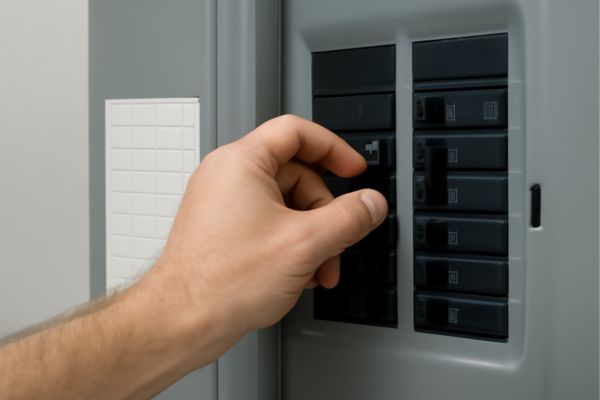
Before you start, The first thing to do is turn off the power. Trust me, This is the most important step. You don’t want To accidentally zap yourself while working around electrical fixtures! It’s a good habit to double-check the breaker to make sure the power is completely off. When I first started, I didn’t realise how critical this was. It’s better to be safe than sorry.
02. Access the Recessed Light Housing
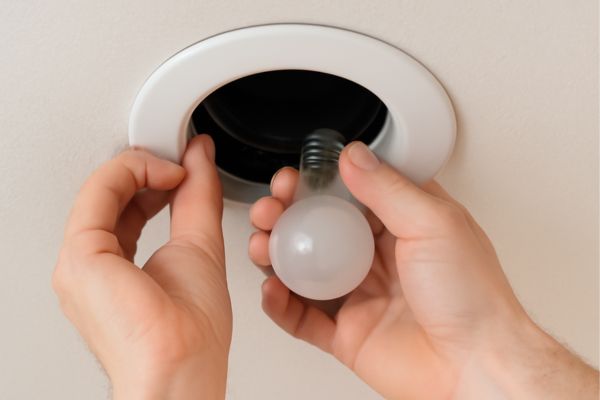
Now that you’ve turned off the power, it’s time to access the recessed light housing. First, remove the trim that surrounds the light. You can usually do this by gently pulling it down. Be careful not to break or damage the trim, as these can be delicate. Once the trim is off, take out the light bulb. This is a good time to explore the Best Recessed Lighting For Bathroom for energy efficiency and style.
03. Choose the Right Insulation Material
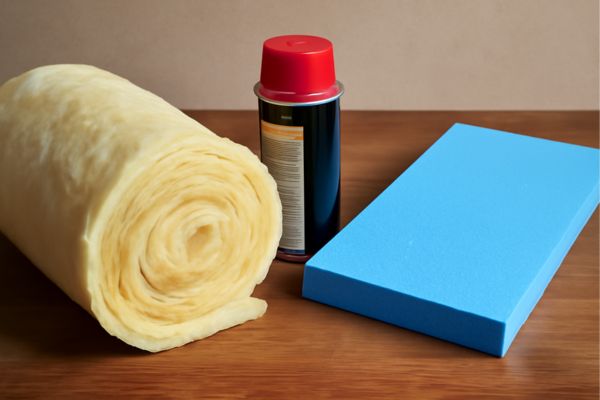
Next, It’s time to choose your insulation. There are a few options here: fibreglass batt, Spray foam, and foam board. I prefer foam board because it provides A tight seal and is easy to work with. Fibreglass batt works too, but foam board just fits better around the can light And doesn’t shift easily.
04. Apply Insulation
Now, carefully place your insulation around the can light. The goal here is to fill the gaps without covering the light socket. Make sure you don’t block the ventilation holes—those are there to keep your light fixture from overheating. Proper airflow is important for safety. This is the step where I’ve learned that being patient pays off.
05. Reassemble the Light Fixture
Finally, put everything back in place. Start by reattaching the trim and replacing the bulb. Make sure the trim is secure and the bulb fits snugly. Once everything is back together, check that everything feels secure. Turn the power back on and test the light. Voila! You’ve just insulated your recessed light and made your home more energy-efficient.
Practical Tips for Perfect Insulation
Use a Non-Combustible Insulation Material
Choose non-combustible materials. Mineral wool or fibreglass batt works best. These materials will not catch fire. I trust them for insulating around lights.
Proper Ventilation
Keep the ventilation holes clear. These allow air to flow and stop overheating. Blocked vents can cause problems. Always ensure they are open.
Check for Gaps
Ensure insulation fills every gap. Gaps allow heat to escape. This makes the less effective. Double-check all areas to make sure nothing is missed.
Seal Around the Edges
Check the edges for small gaps. Use caulk or tape to seal them. This ensures the insulation stays in place. Sealing gaps prevents air from leaking out.
Types of Recessed Lights and Insulation Tips for Each
IC (Insulation Contact) Rated
IC-rated lights can be covered with insulation directly. However, don’t press the tightly against the fixture. Leave space for heat to escape. This ensures safety.
Non-IC Rated
Non-IC lights should not touch insulation. These fixtures need airflow to avoid overheating. Use insulation boxes or barriers to keep away from the light.
Common Mistakes to Avoid

Over-Insulating
Adding too much insulation can block air vents. This traps heat and can cause the light to overheat. Too much can also make your light less efficient. Use just enough to get the job done.
Not Considering the Fixture Type
It’s crucial to know if your light is IC-rated. IC-rated lights can safely touch insulation. Non-IC lights need a gap to prevent overheating. Not checking can lead to safety problems.
Forgetting Safety
Safety should always come first. Use non-combustible materials like mineral wool. Never block the ventilation holes. This ensures both safety and comfort.
Conclusion
In this article, we covered the importance of insulating recessed lights. Proper insulation helps save energy, reduces fire risks, and keeps your home comfortable. We also walked through the simple steps for insulating lights and highlighted key tips for perfection.
Faqs
Why is it important to insulate lights?
It helps save energy, prevents overheating, and keeps your home more comfortable. Proper insulation also reduces the risk of fire hazards from hot fixtures.
Can I use any insulation for lights?
No, always use non-combustible materials like mineral wool or foam board. This ensures safety by preventing the risk of fires and helps them perform effectively around the light fixture.
What is the difference between IC-rated and non-IC-rated recessed lights?
It can be covered directly with insulation. Non-IC-rated lights need a gap to prevent overheating. Always check your light type before insulating for safety.